March Brown Dry Fly

The march brown is a classic dry fly using brown and grizzle hackle, mallard flank feathers and a light dubbing material.
- Submitted By: Fly Tying Guide
Materials
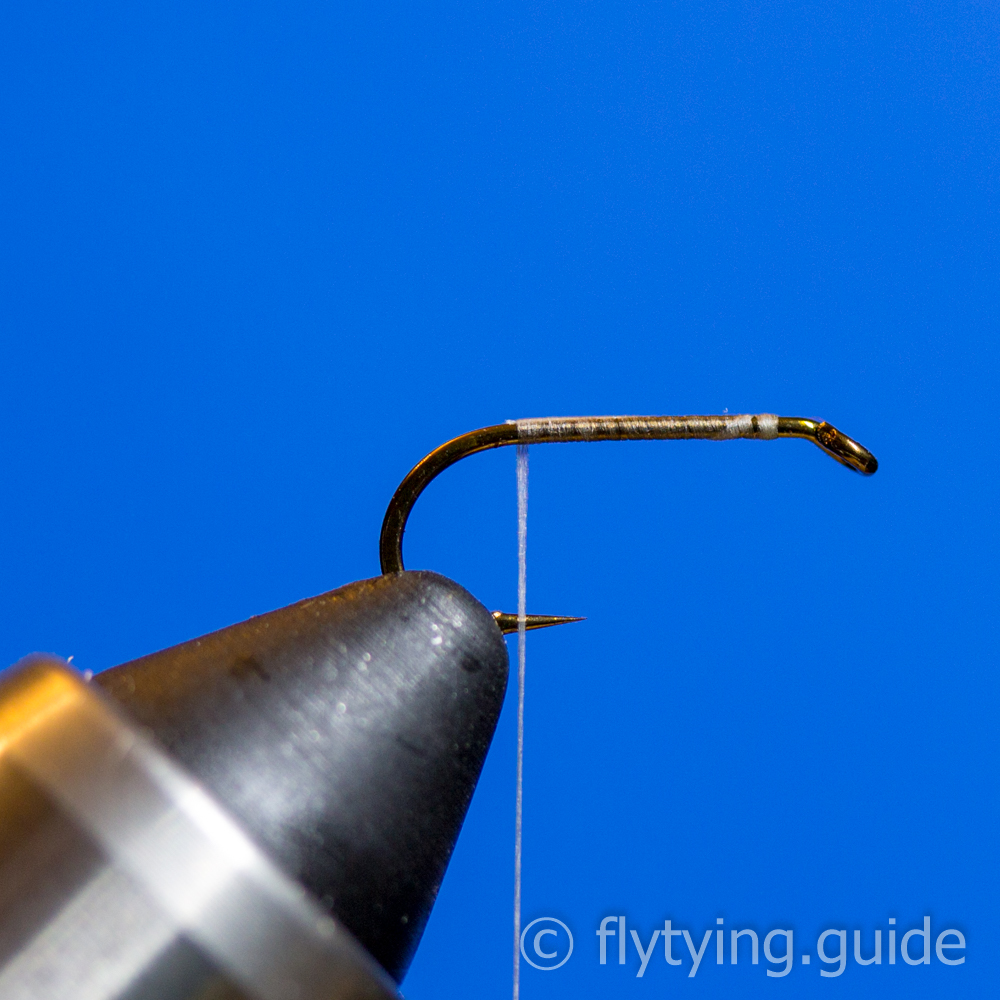
1
Place the hook in the vise and secure the thread behind the eye. Position the thread at the start of the bend.
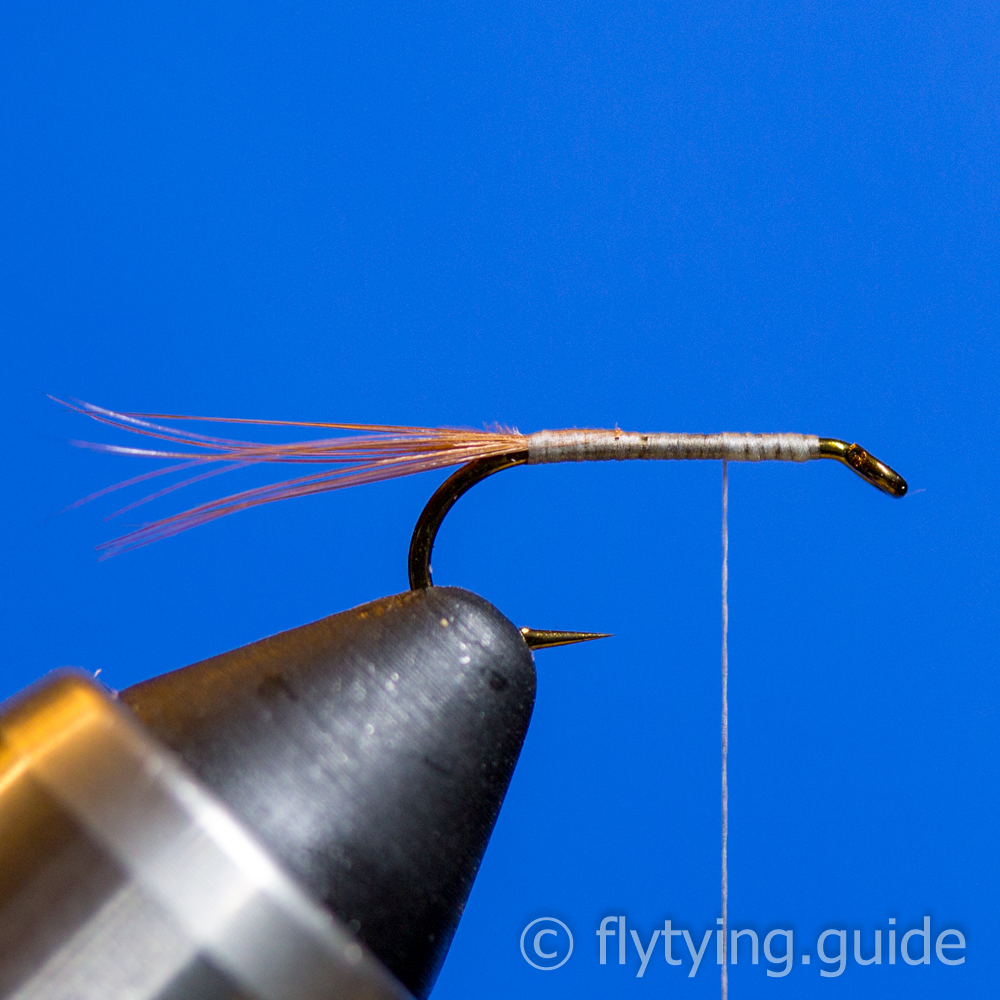
2
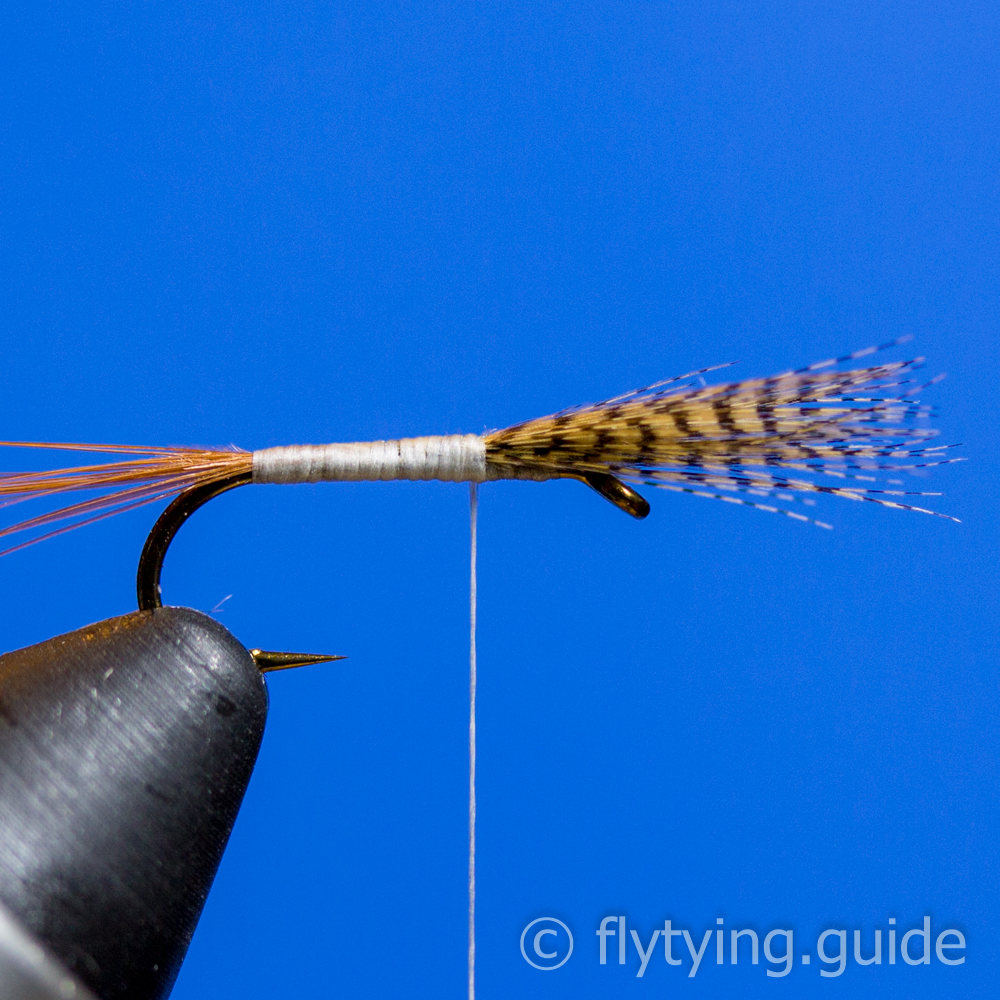
Align and tie in a few brown hackle fibers to form a tail, he tail should extend the length of the shank beyond the start of the bend. Cover the tag ends with thread and then return the thread to 1/3 of the shank length behind the eye.

3
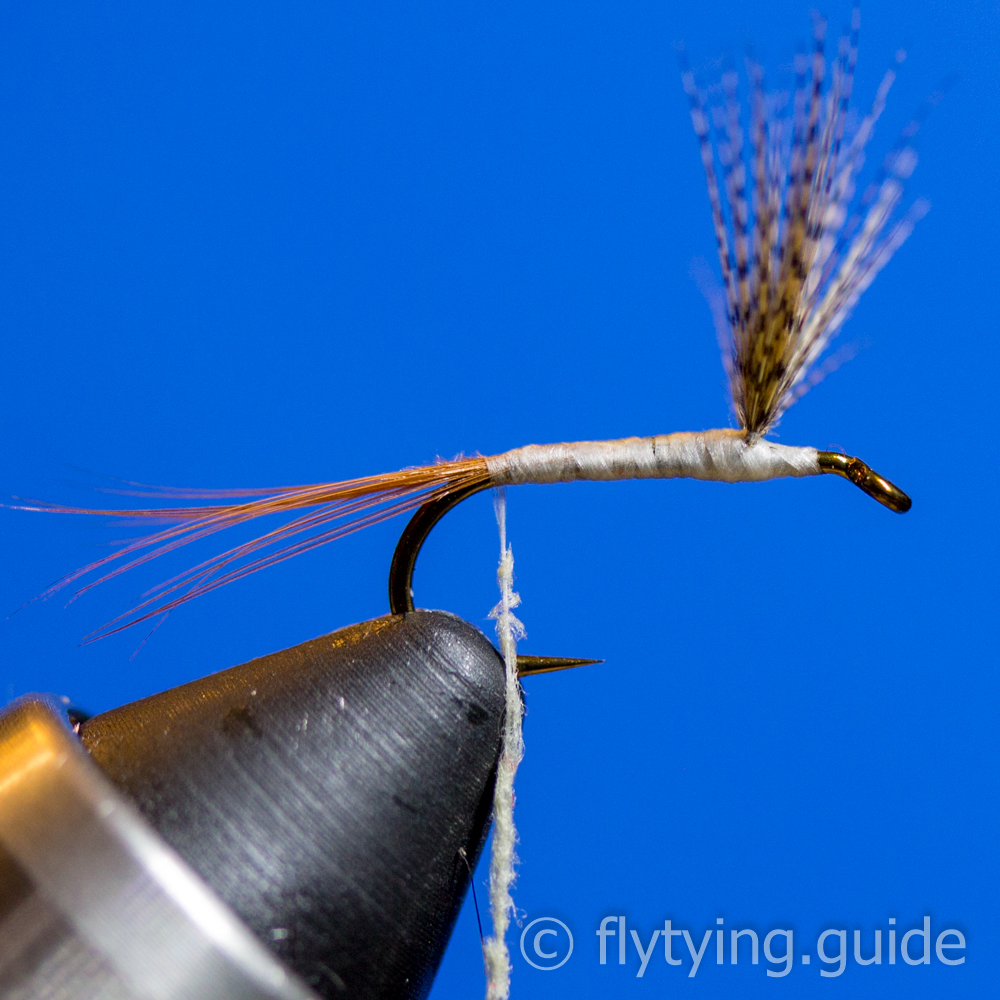
Prepare a mallard flank feather by removing the fluff and clipping out the tip to form a V, the length of the fibers should be equal to or longer than the hook shank.
4
Stroke the fibers from the bottom of the feather to align the tips, measure the tips so they are the length of the hook shank to prepare for the next step.
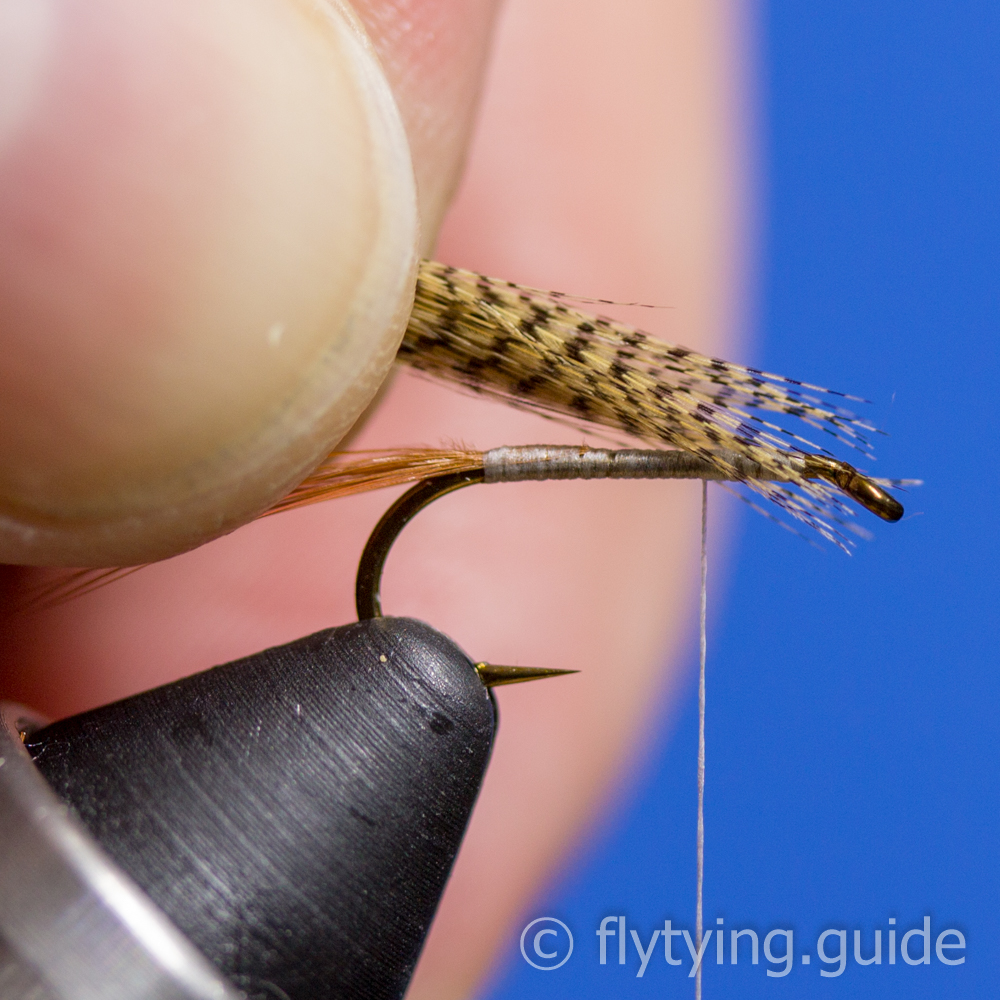
5
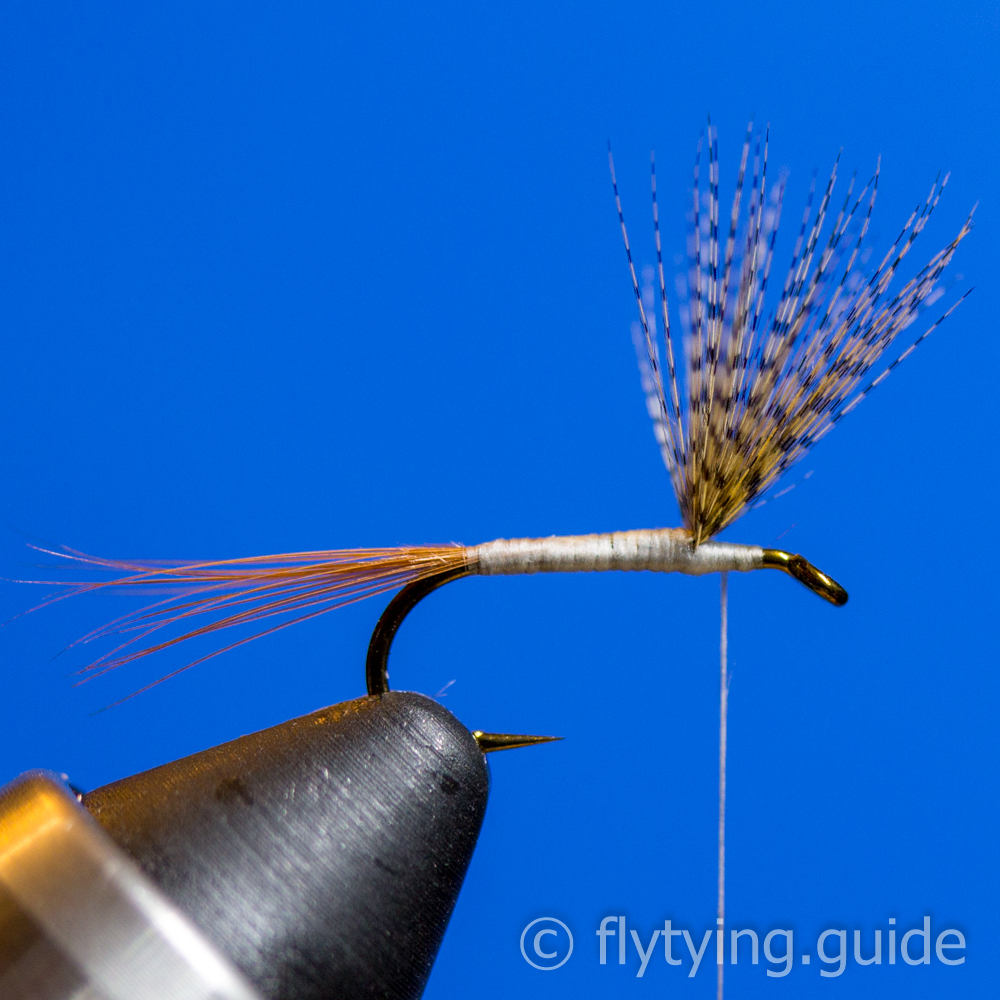
Use a pinch wrap to secure the wing on top of the hook shank.

6
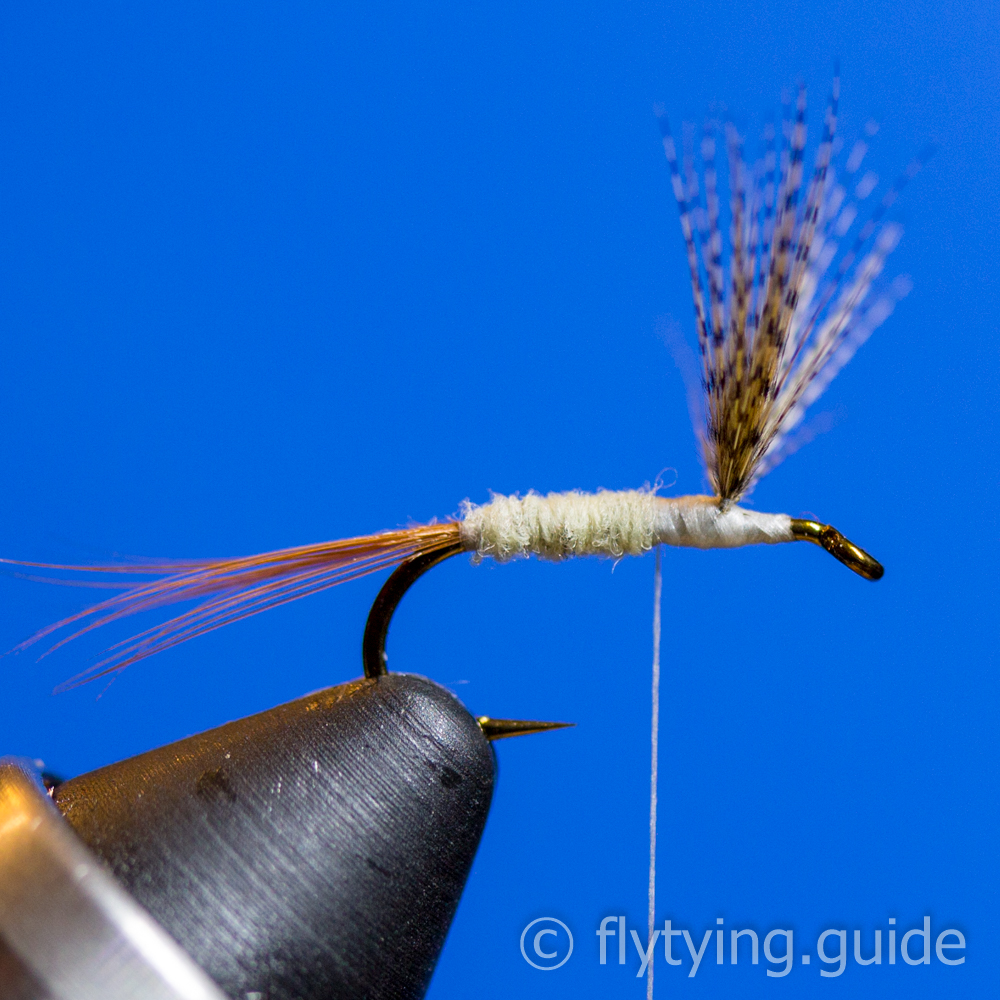
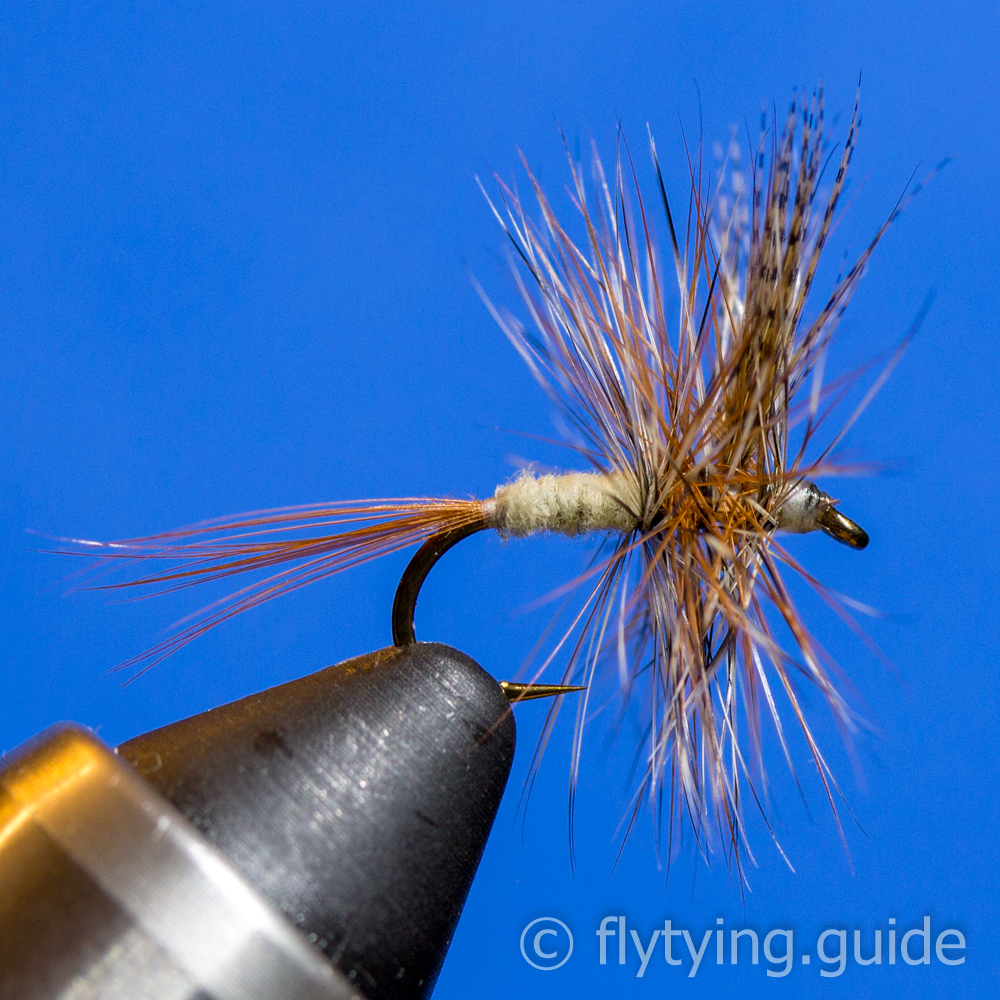
Trim the butt ends off at a gentle angle going back to the tail, this will help form the tapered under body.
7
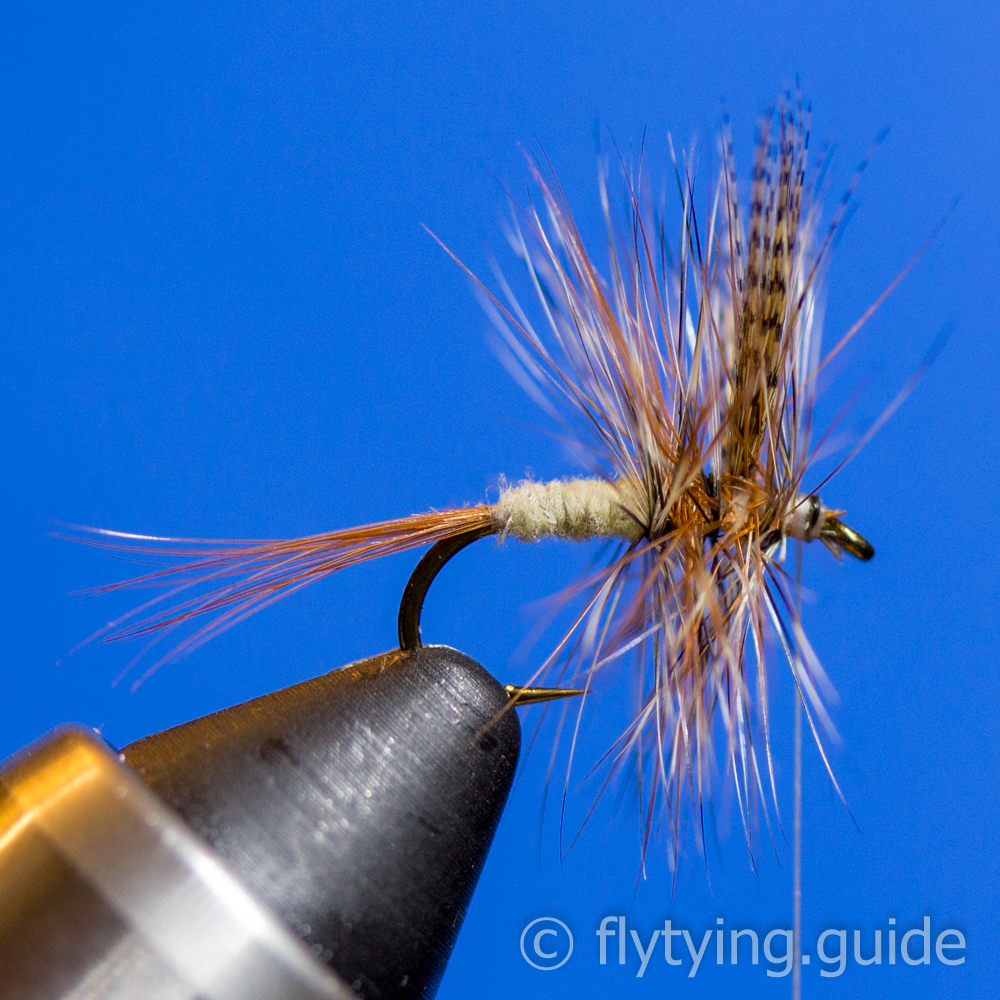
Cover the butt ends with flattened thread to form a smooth tapered under body. Return the thread to just behind the wing.
8
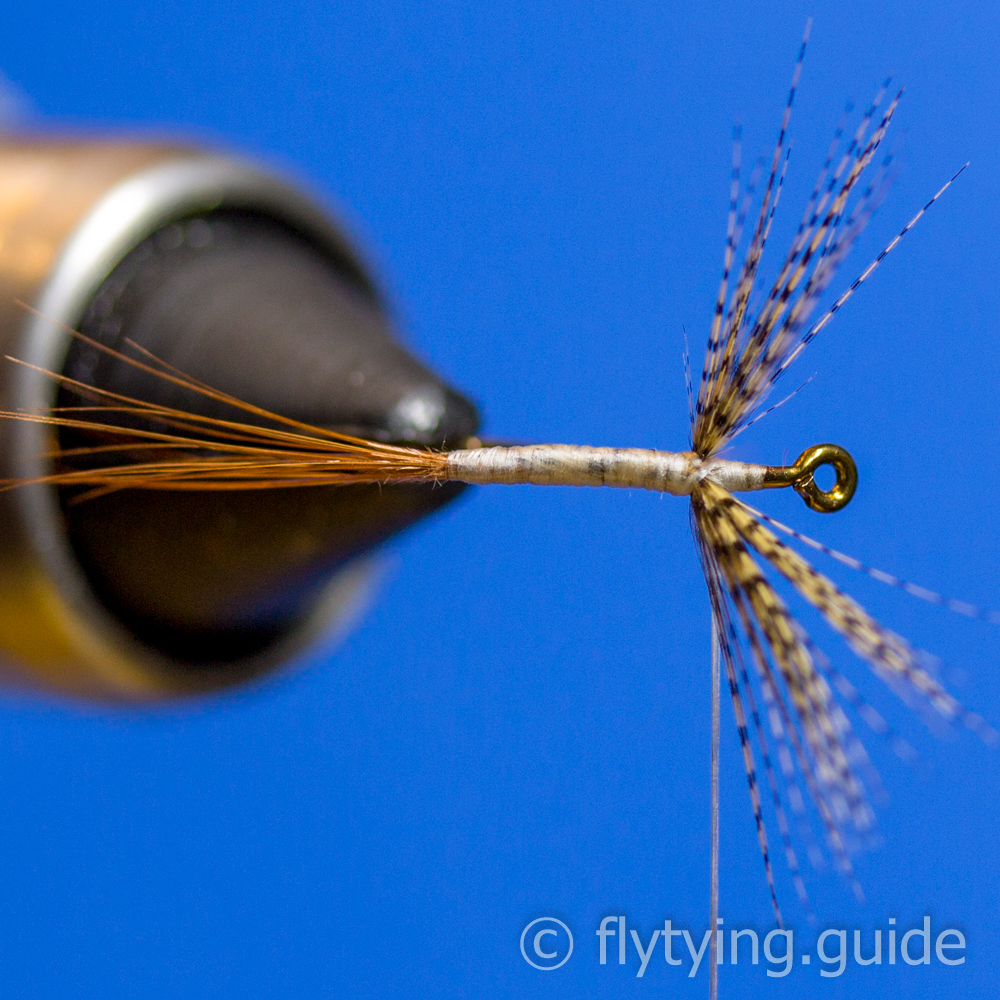
Pull back the wing with your off hand, and build a small dam of thread in front of it to stand up the wing.
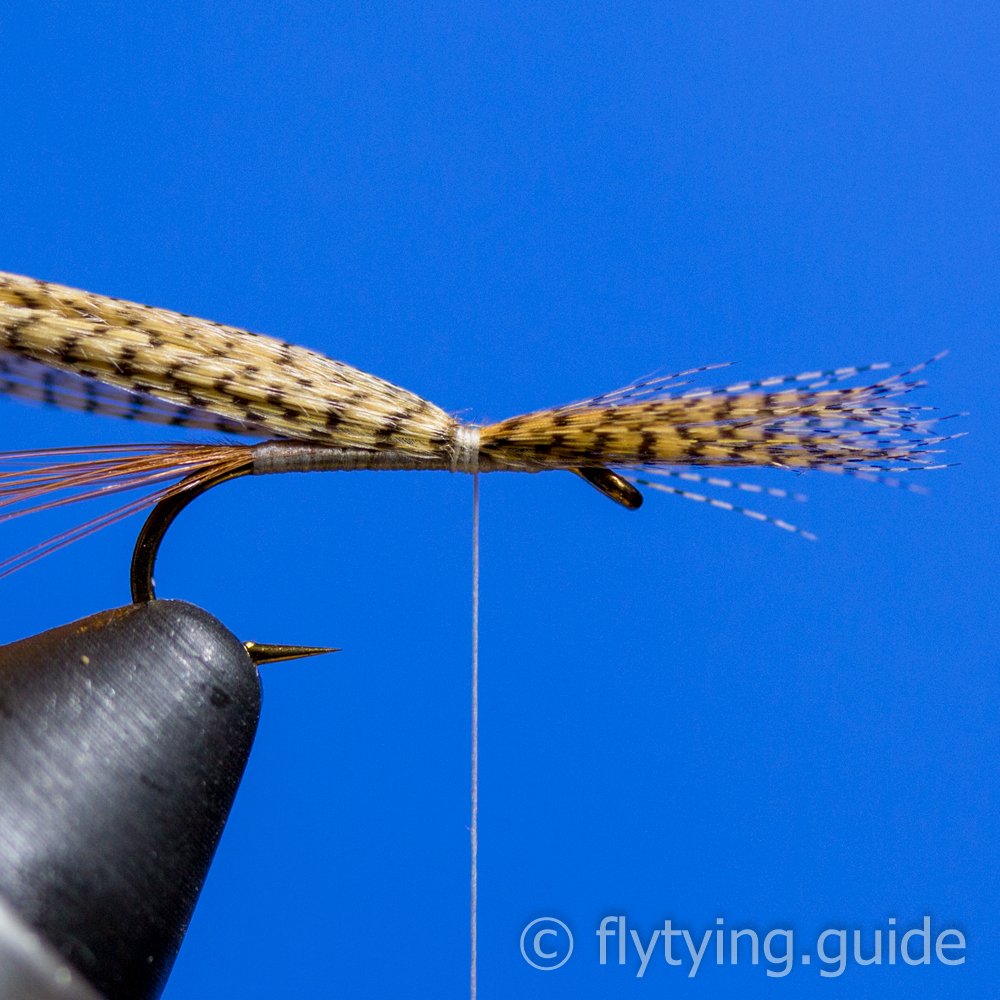
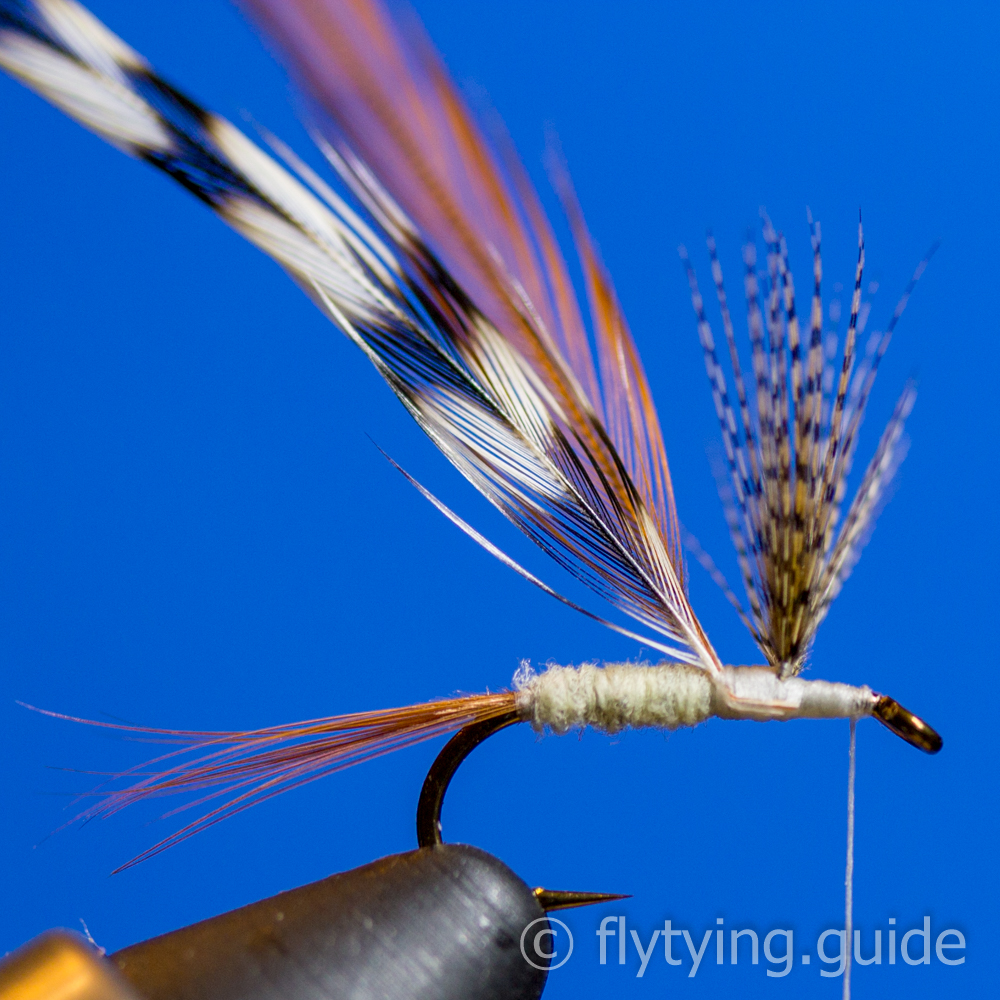
9
Use a bodkin needle or similar to split the fibers evenly, and then place an x wrap to separate the wings.
To perform the x wrap, start in front of the wing and cross the thread on top of the hook shank between the separated fibers. Carry the thread around the bottom of the shank behind the wing and again cross the thread on top of the hook shank in the opposite direction to form an X between the wing bunches.
To perform the x wrap, start in front of the wing and cross the thread on top of the hook shank between the separated fibers. Carry the thread around the bottom of the shank behind the wing and again cross the thread on top of the hook shank in the opposite direction to form an X between the wing bunches.

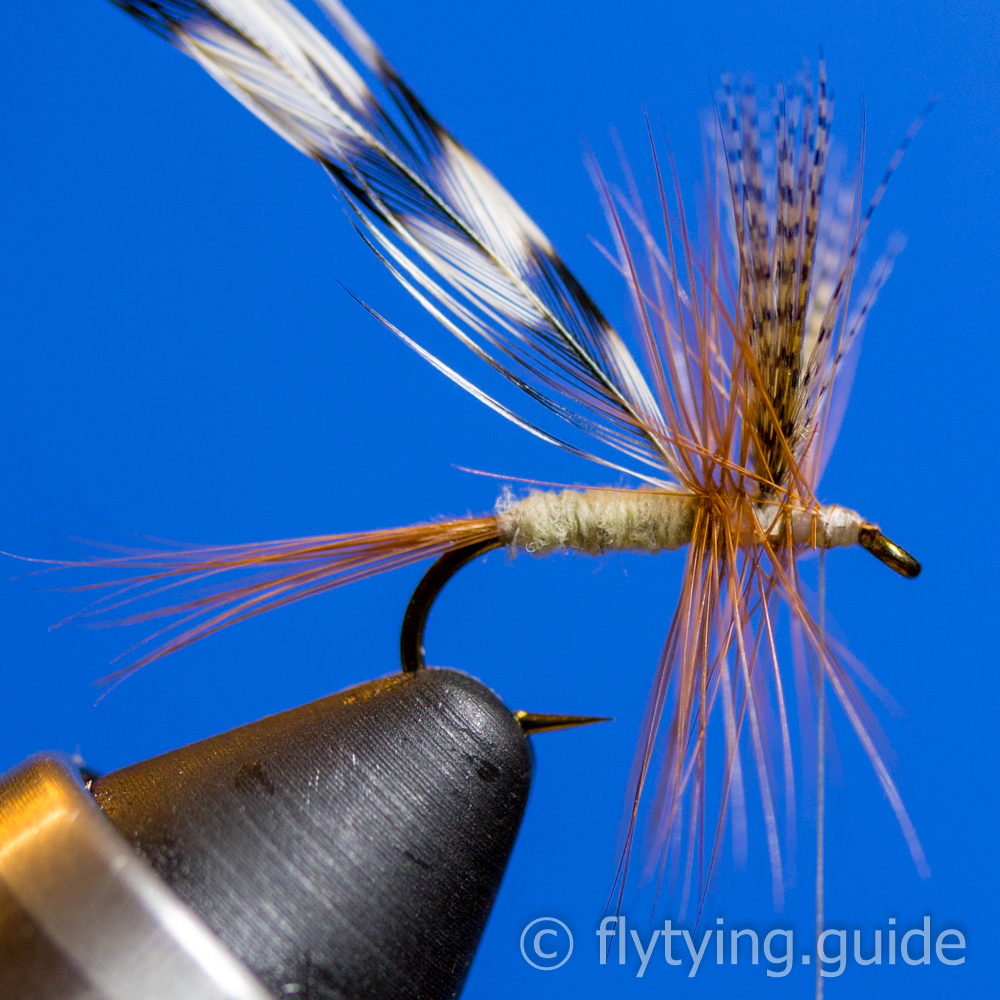
10
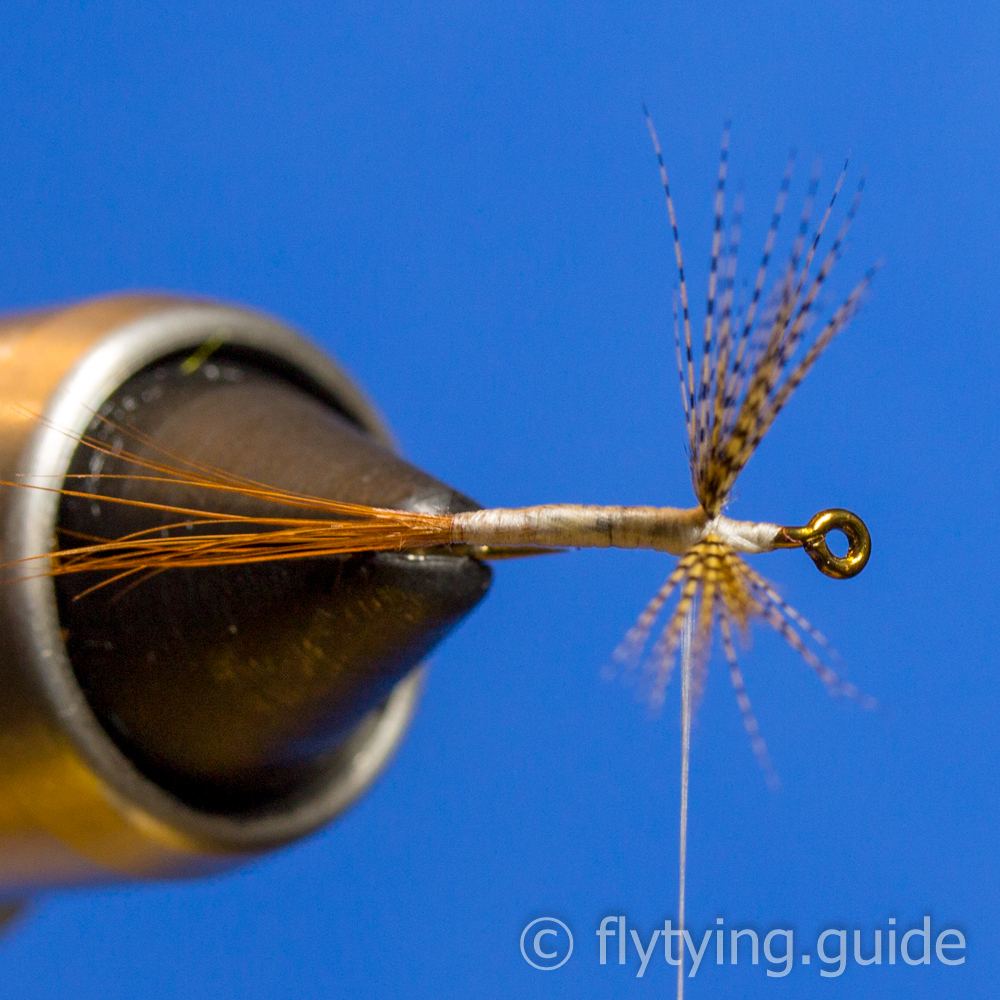
Use a figure 8 wrap to compress the bunches and pull them on top of the hook shank. The figure 8 wrap is the trickiest part of the fly and will take some practice. This is the side view of the finished wrap.
To perform the figure 8 wrap start behind the wing. Start to take a wrap of thread, as your thread dips below the far wing (at about the 3/4 mark) you want to capture the base of the far wing with the thread by moving the thread in front of the wing, pinch the far wing with your off hand at this point and then cross the thread on top of the hook shank between the wings. You have just created the top portion of a figure 8. Apply enough pressure to bunch the wing fibers together and stand them up on top of the hook shank.
11
The top view of a finished figure 8 wrap.
Keeping a constant pressure so that you do not lose your work, release the far wing and pinch the near wing. Take a wrap around the near wing from back to front and then cross between the wing to complete the figure 8. Adjust the tension so that the wings are even and then take a wrap behind the wing to lock in the wraps. Repeat one or two more times until you are satisfied with the results.
12
Return the thread to the start of the bend and apply a thin dubbing rope to the thread.
13
Form a slender tapered body stopping about one eye length behind the wing.
14
Tie in the two dry fly hackles behind the wing, clip the excess stem and run the thread to behind the eye leaving room to form a head.
15
Wrap and tie off the first hackle by taking two to three turns behind the wing, and the same in front. Remove any excess.
16
Wrap and tie off the second hackle the same way. Remove any excess.
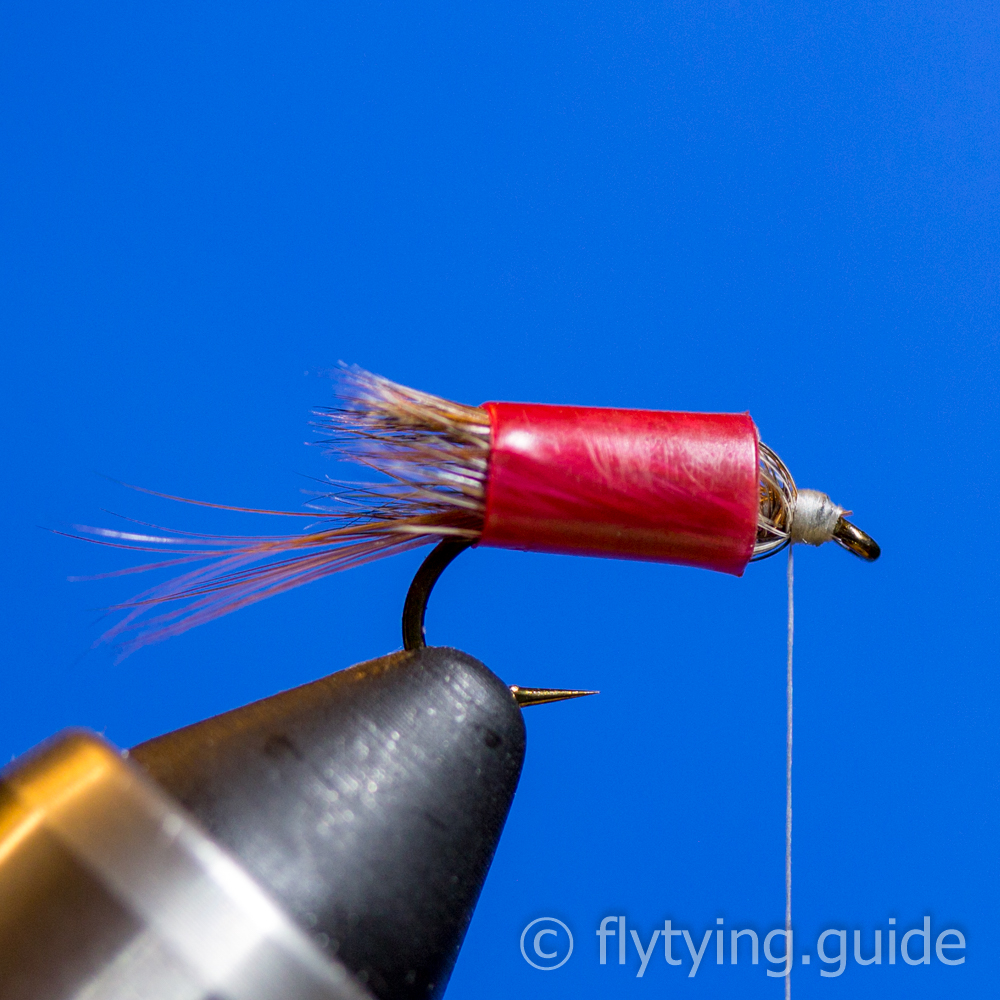
17
I keep a small piece of straw on my bobbin when tying dry flies so that I can slide it over the hackle to make it easier to work on the head.
18
Form a small head with thread, whip finish and apply head cement.
19
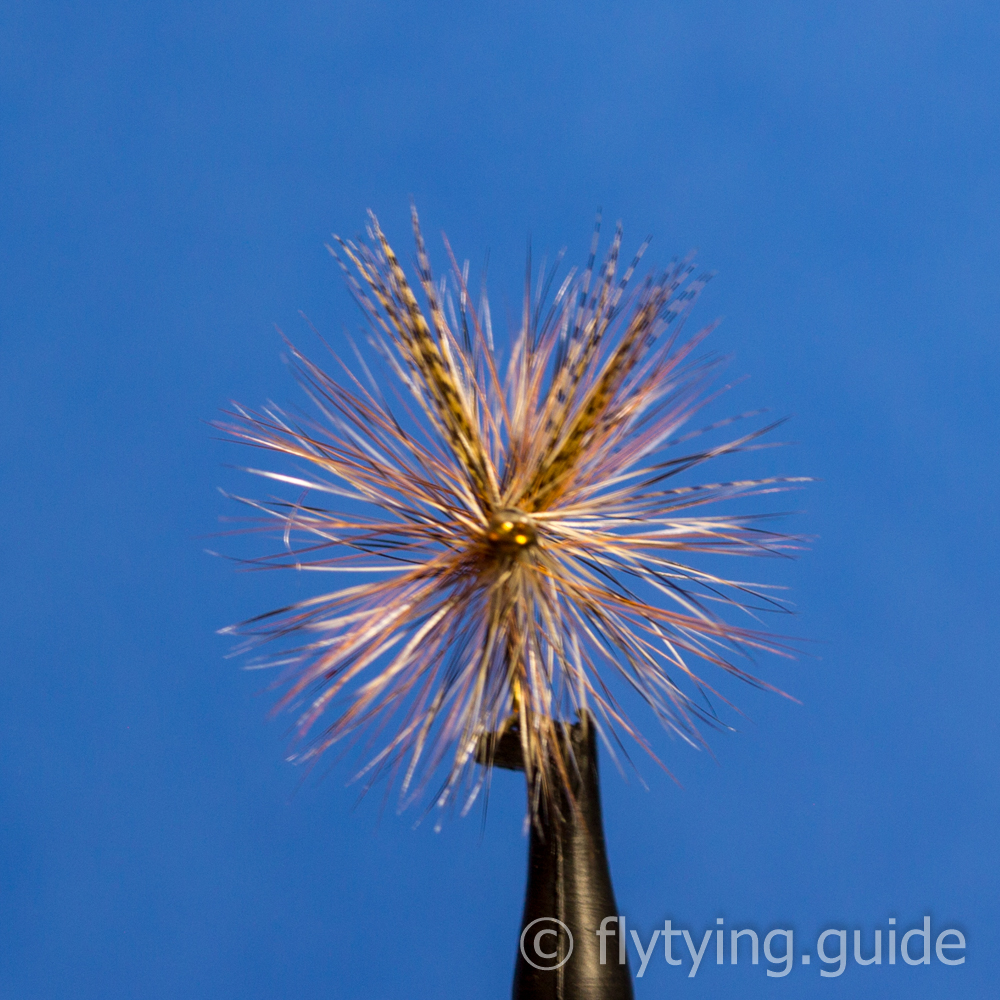
A view of the finished fly from the front.