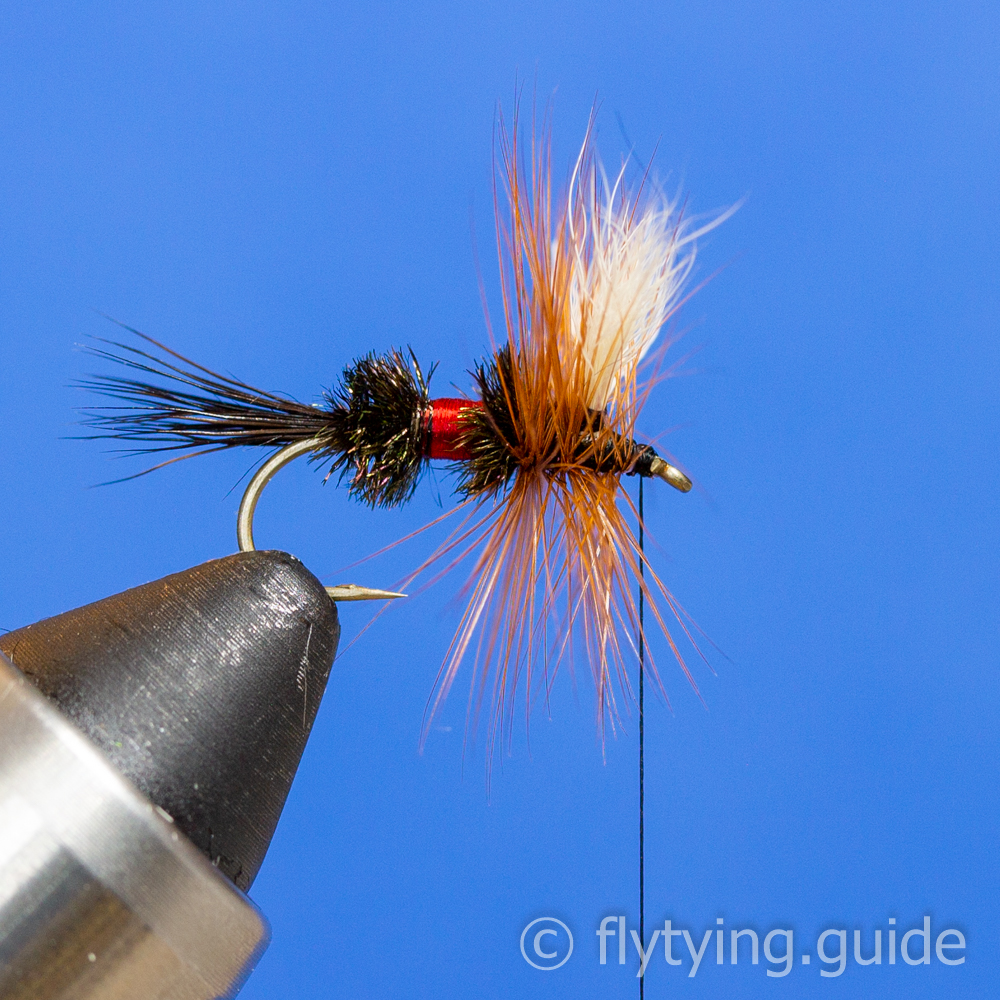
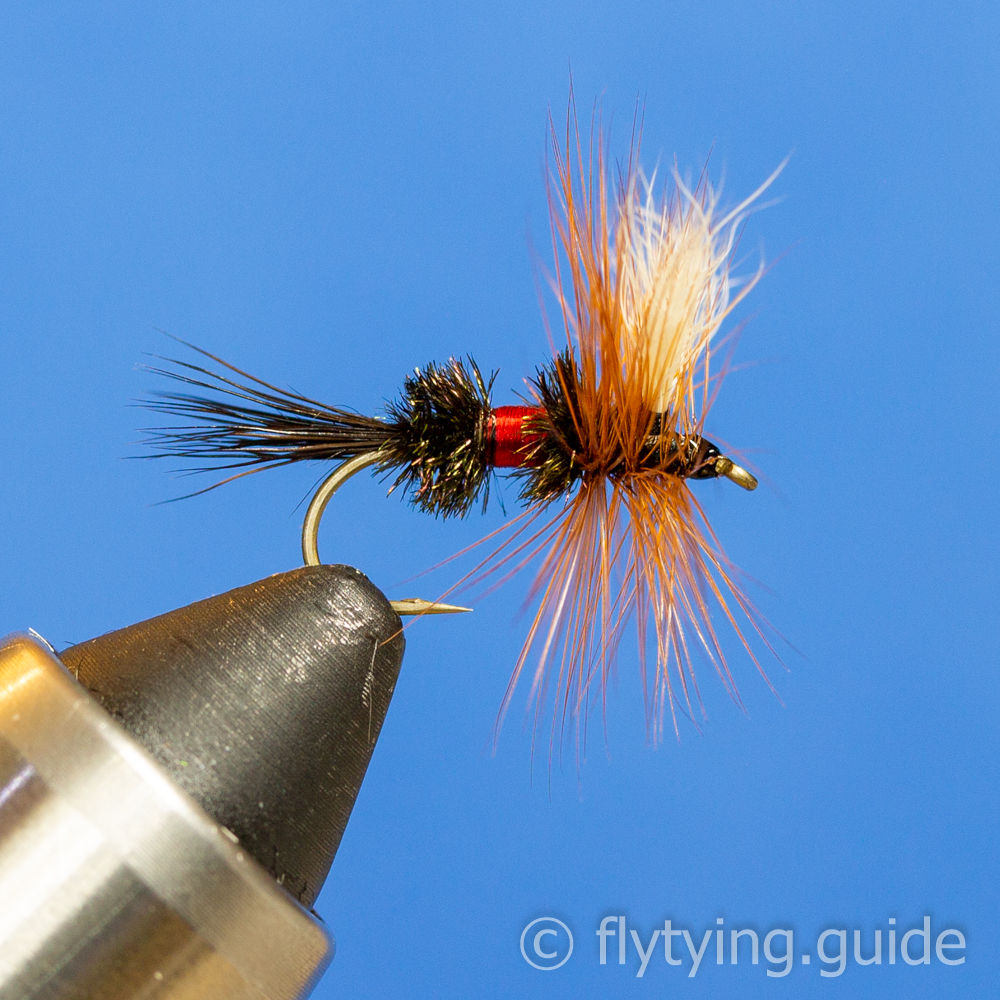
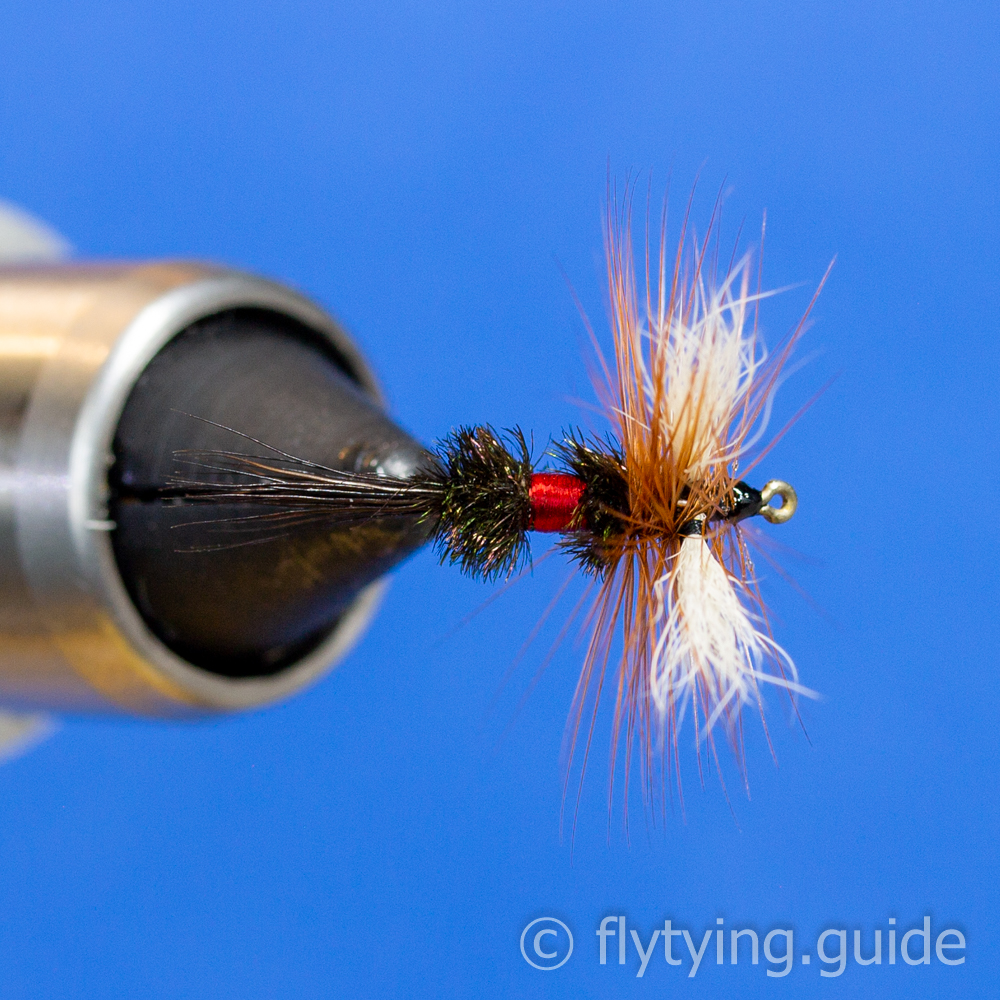
Royal Wulff
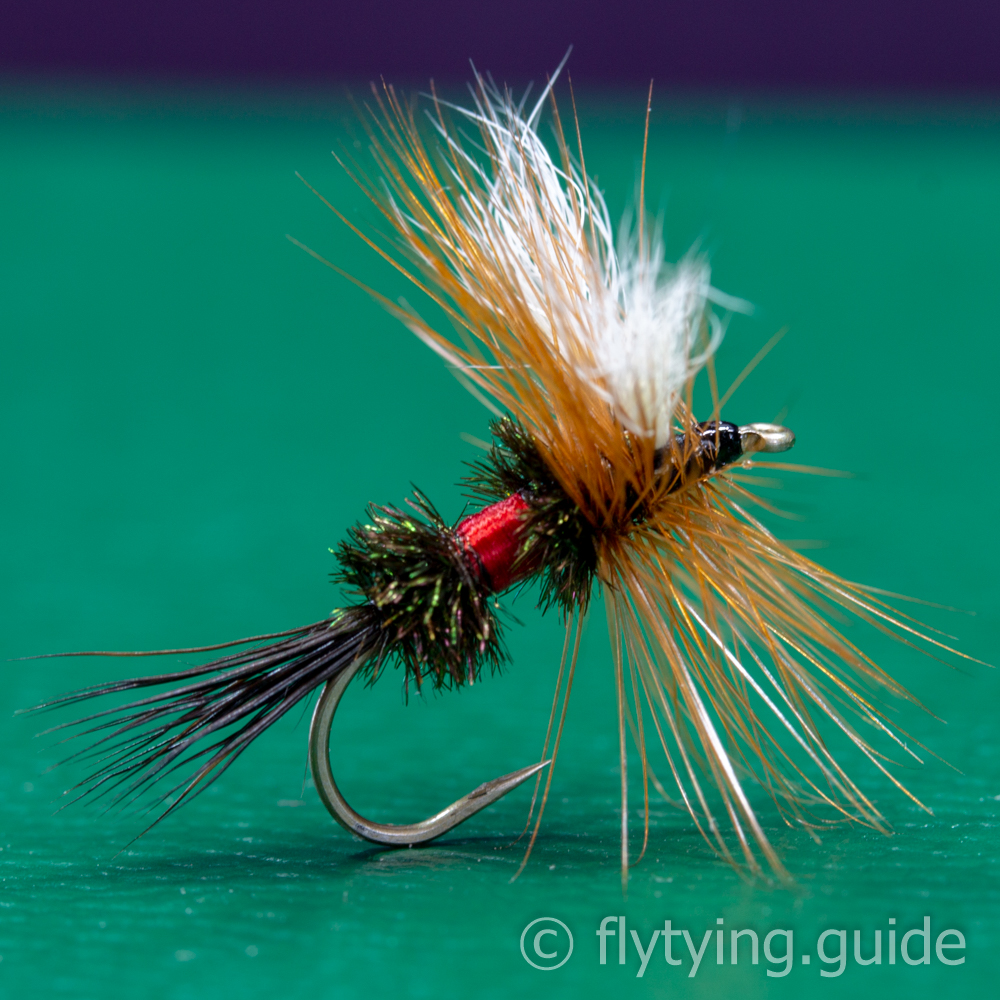
Made famous by Lee Wulff, this variation of the royal coachman uses dark hair from a moose body as a tail in place of the golden pheasant tail, and calf hair for the wing in place of quill slips. The distinctive royal body made from peacock and red floss body are retained.
- Source: Lee Wulff
- Submitted By: Fly Tying Guide
Materials
1
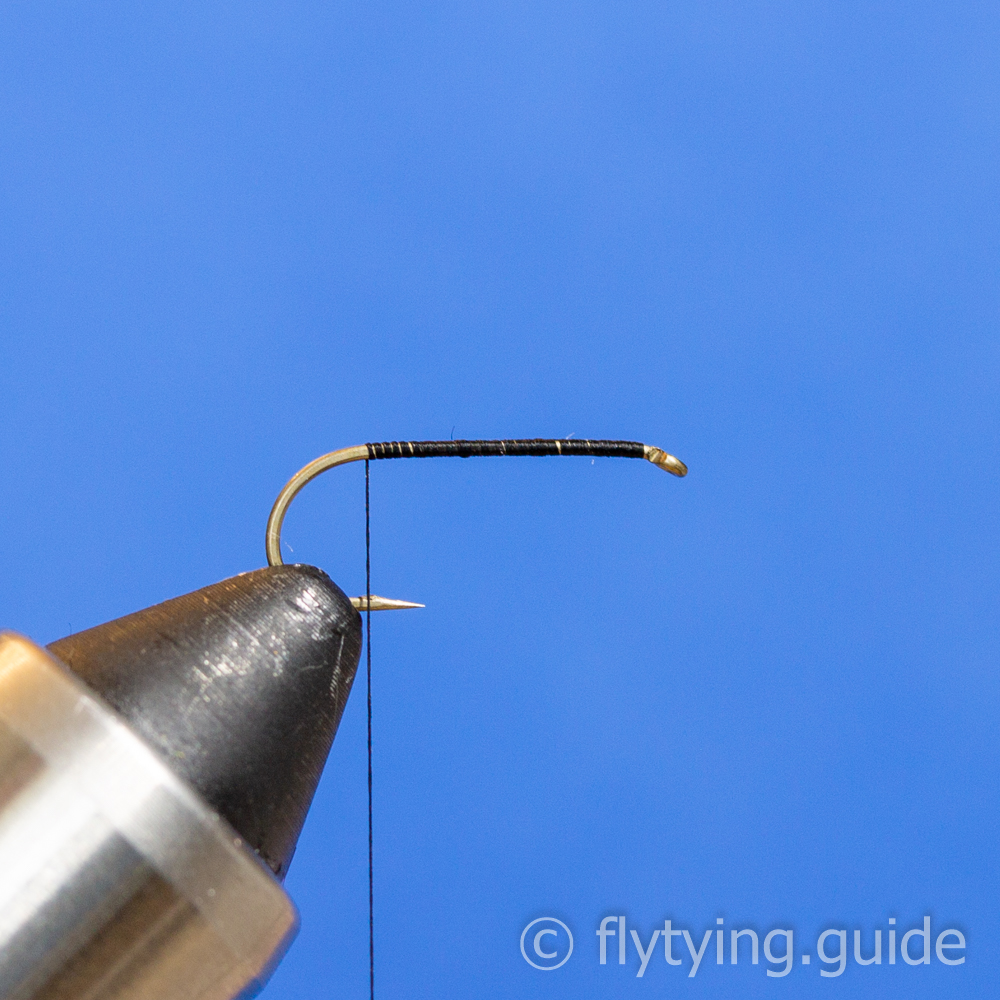
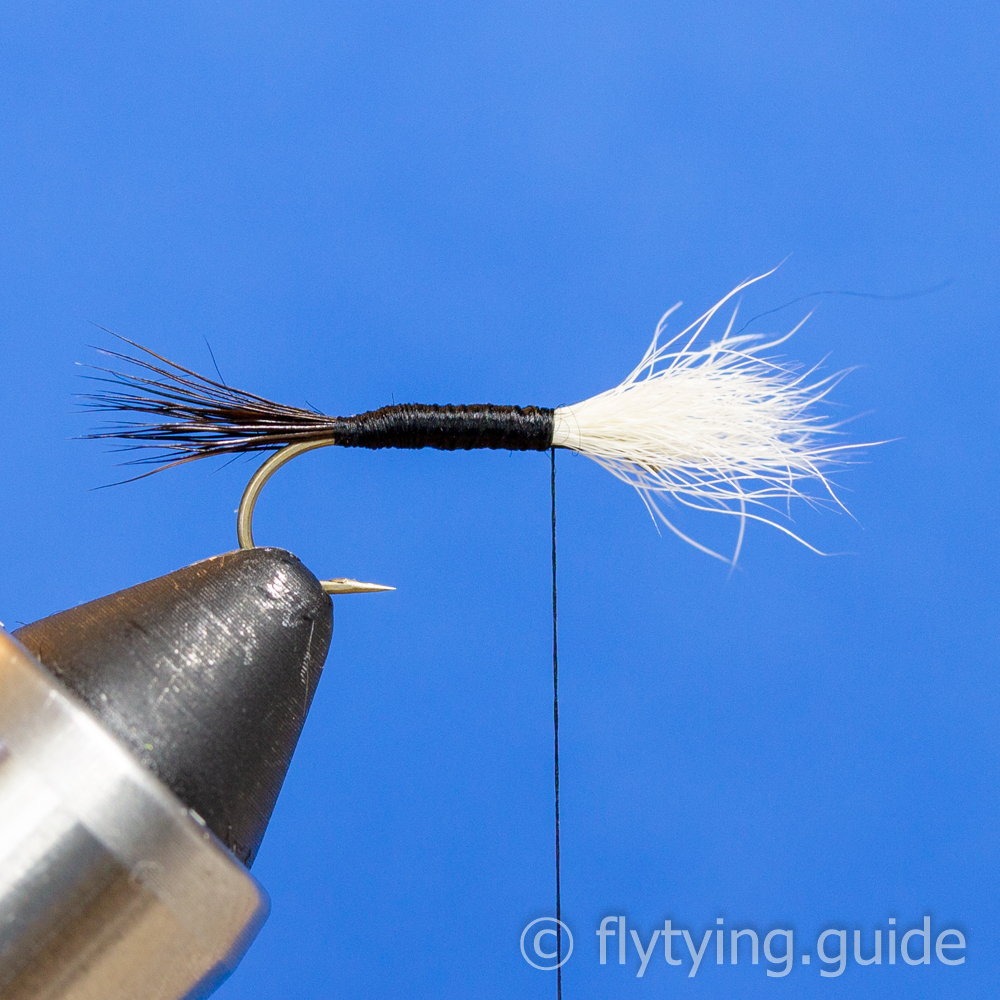
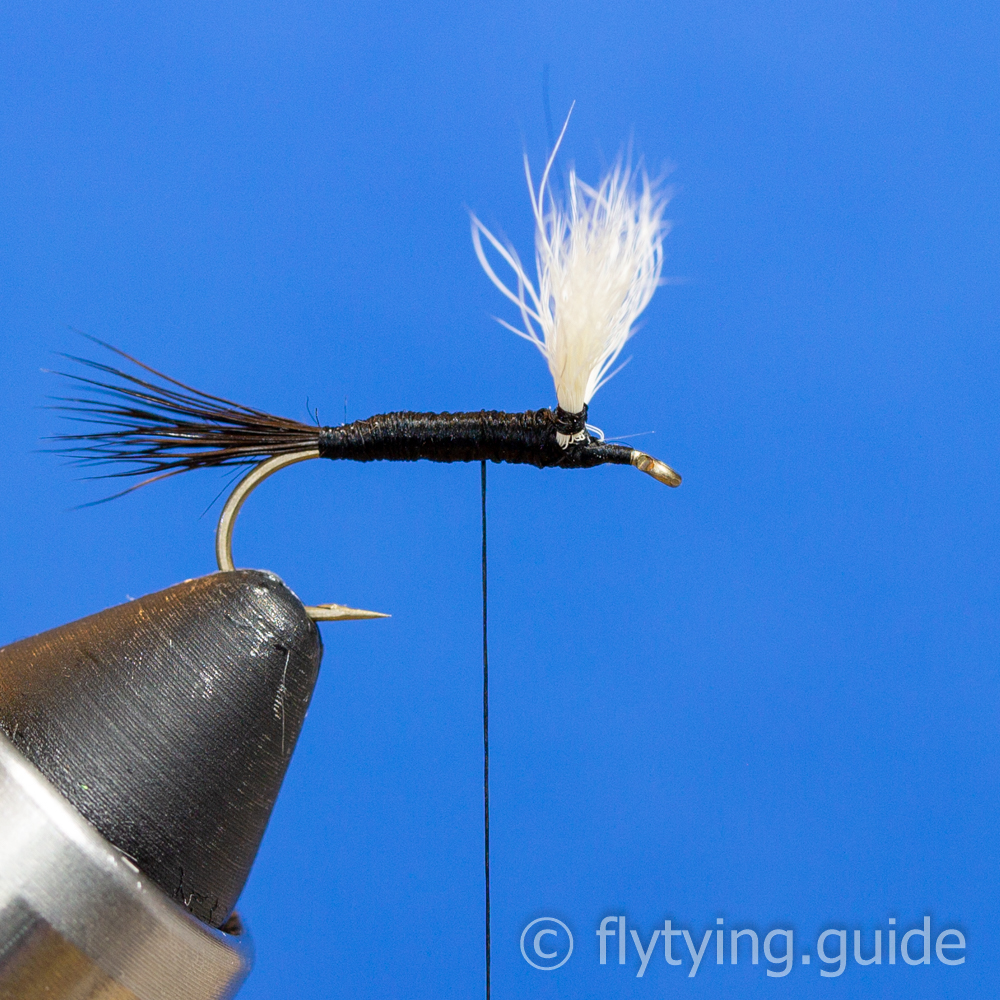
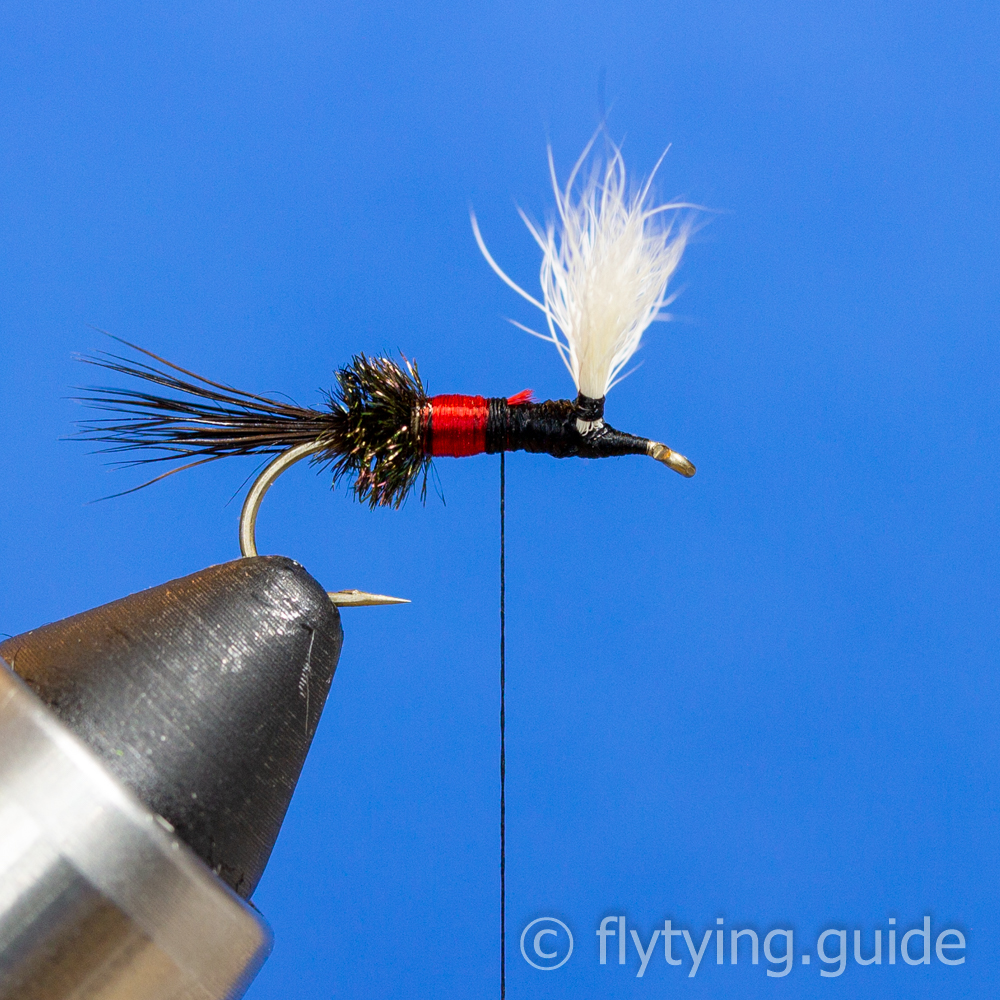
Place the hook in the vise and secure the thread behind the eye. Run the thread back to the start of the bend, opposite the barb.
2
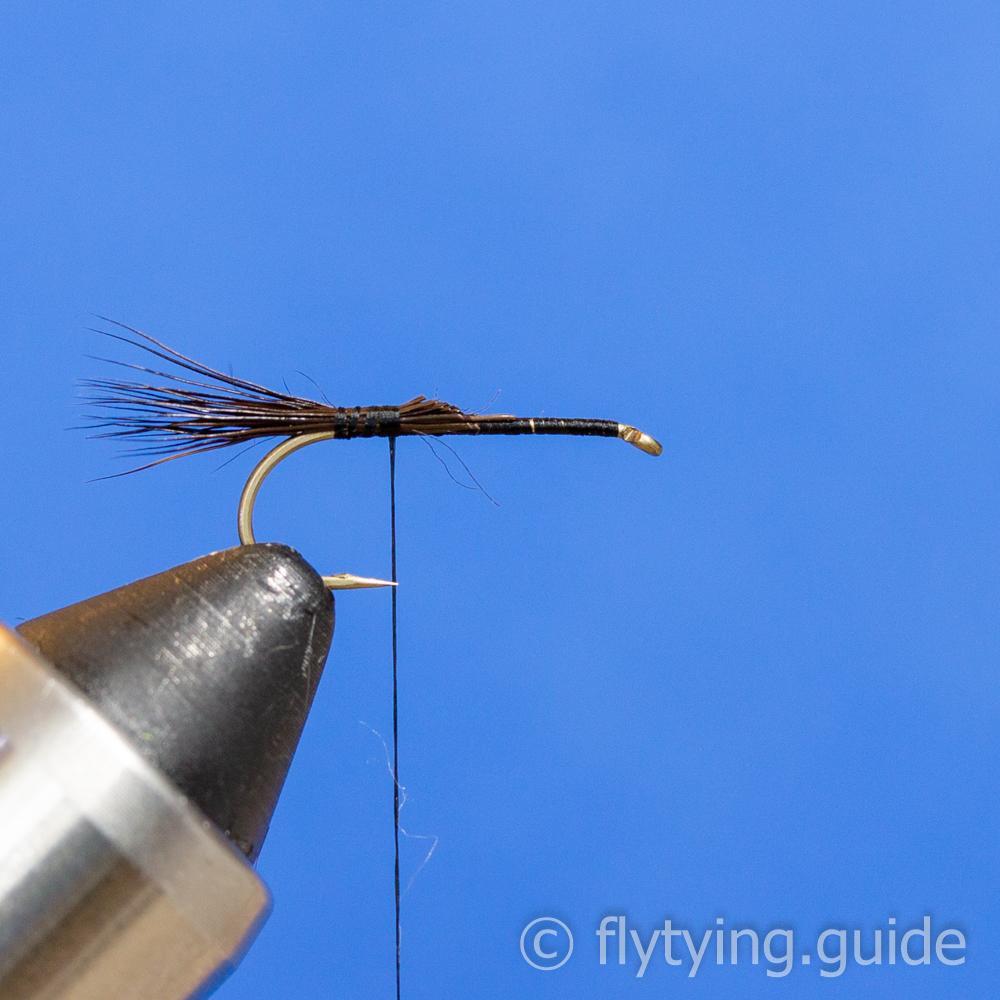
Snip off a pinch of moose hair and remove the fluff, place the hair in a stacker to align the tips. Measure the tail so it extends about a half a hook shank beyond the bend and tie in. Snip off the butt ends at an angle.

3
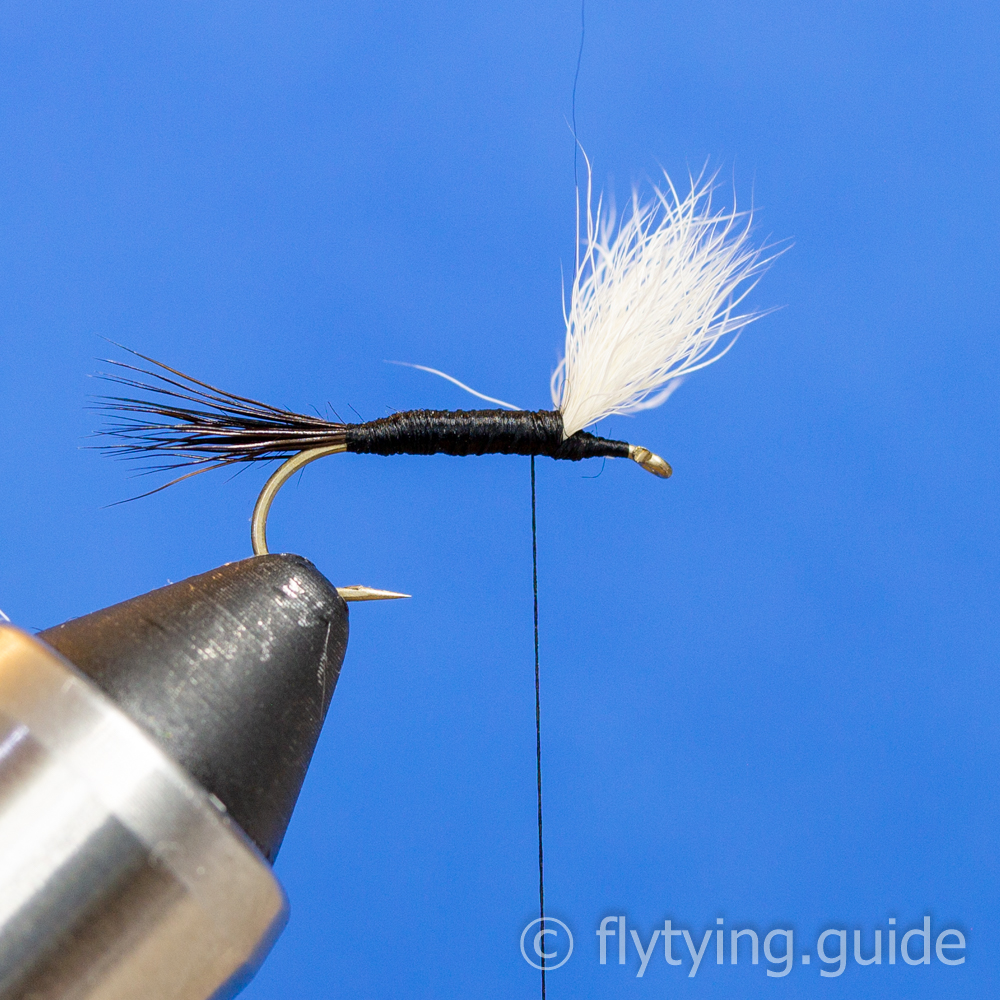
Cover the butt ends of the tail and progress the thread to about the one quarter point behind the eye.
4
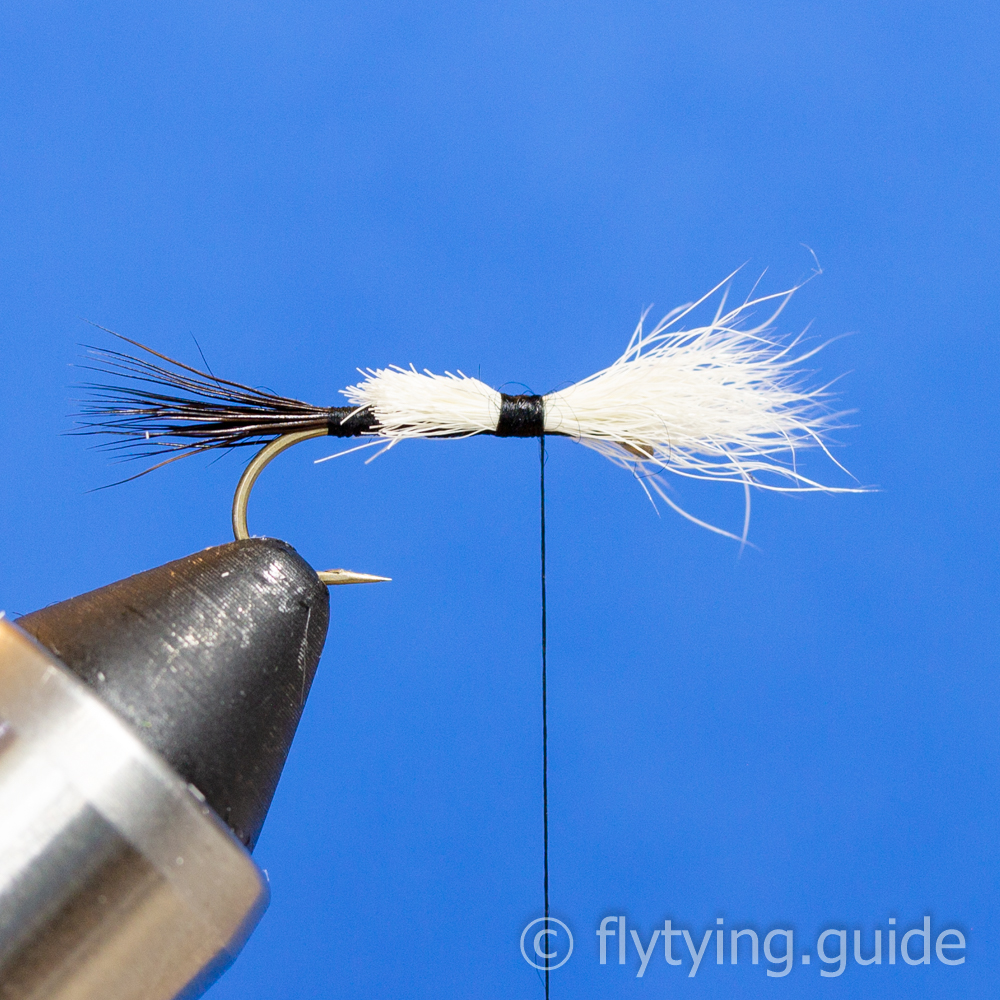
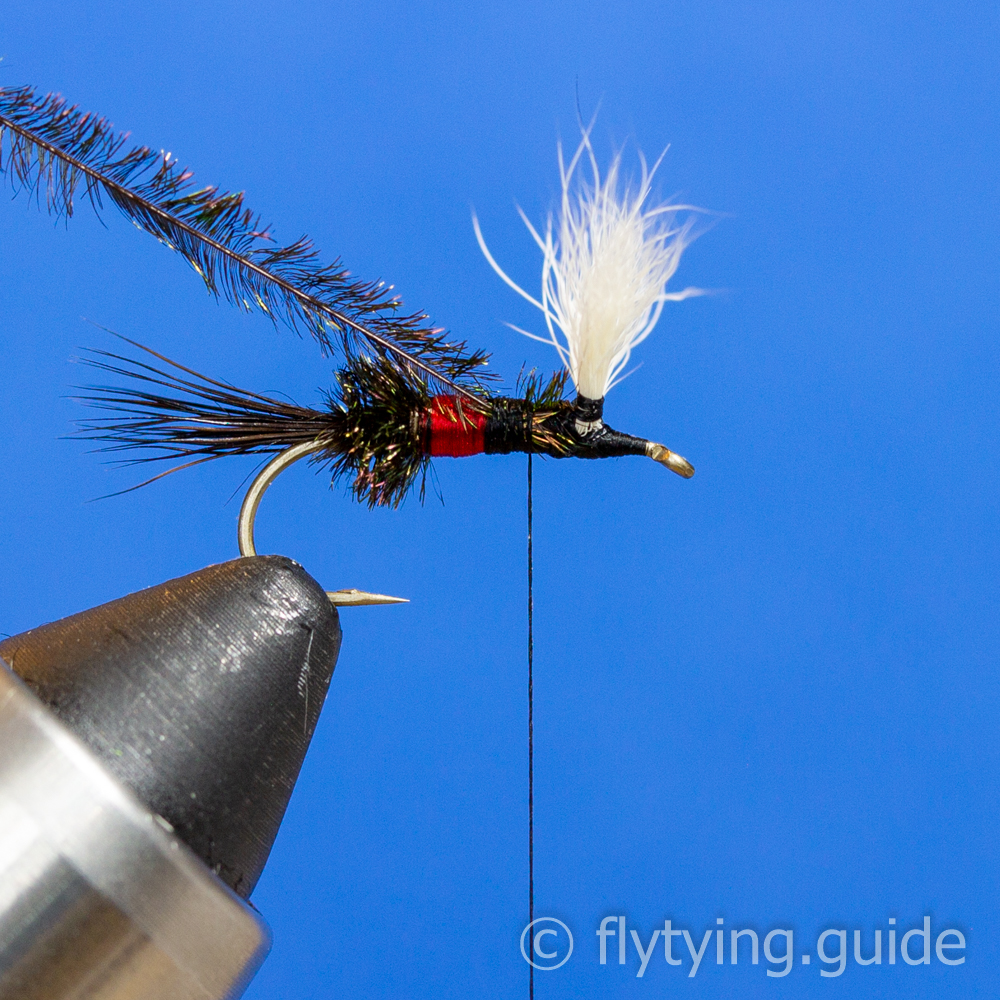
Snip off a generous pinch of calf hair, about a hook gap in diameter. Remove the fluff, the size of the pinch will shrink considerably doing this, and place in a stacker to align the tips. Measure the wing so it is about a half a hook shank in length and tie in with a pinch wrap. Calf hair is very slippery so secure with several tight wraps to secure it to the top of the hook shank before you release it to trim the butts. Trim the butts at an angle.
5
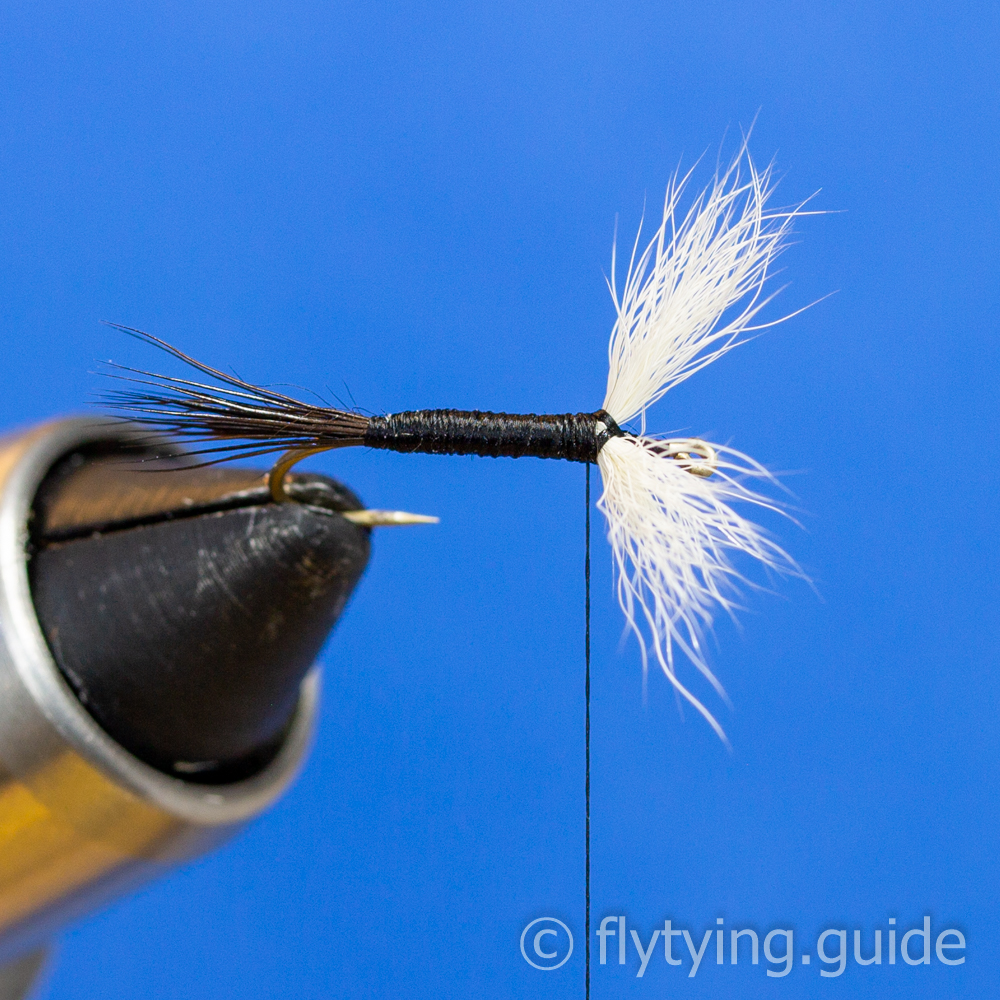
Cover the butt ends of the calf hair with thread to create a smooth underbody and then return the thread to the tie in point.
6
Lift up the calf hair and build a dam of thread in front of it to stand it up.
7
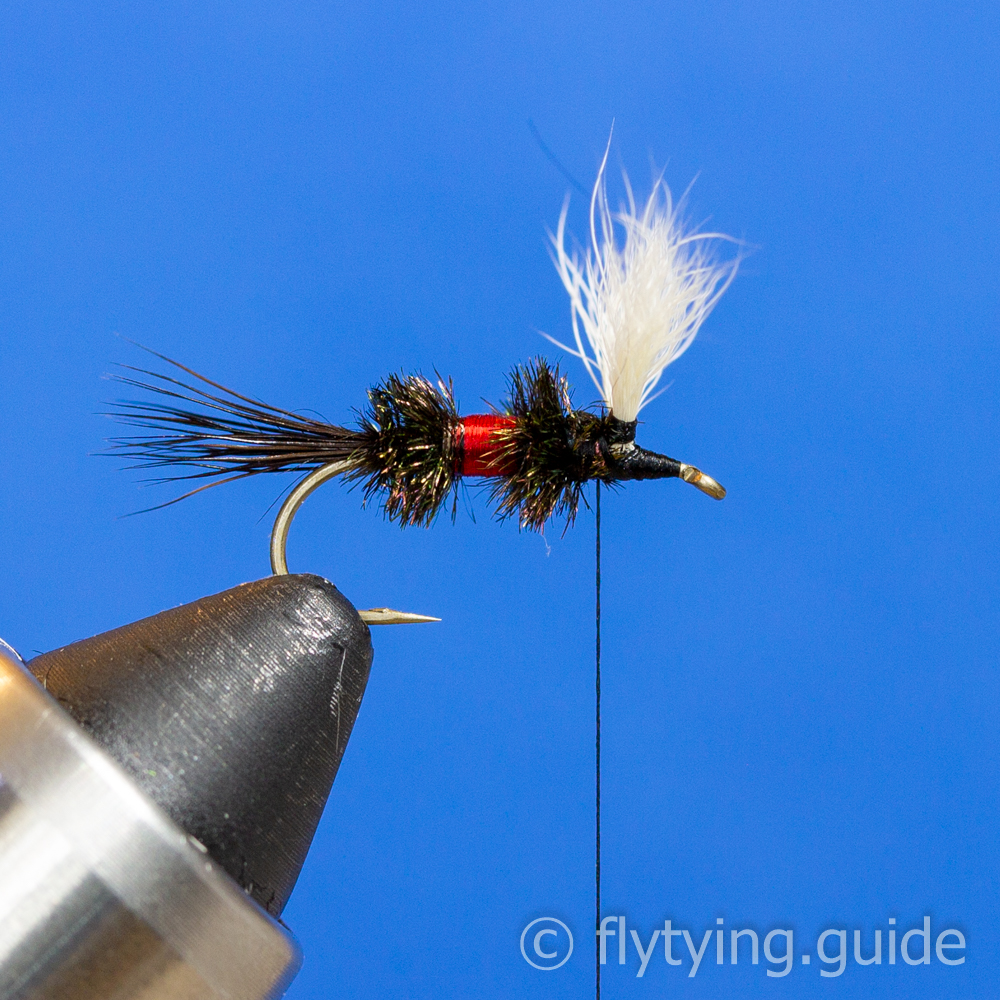
Use a bodkin or dubbing needle to split the hair in two equal bunches and wrap thread between them in an x pattern to separate the bunches.
8
Wrap thread three or four times around the base of each of the clumps similar to a parachute post to compress the bunches and help position them.
9
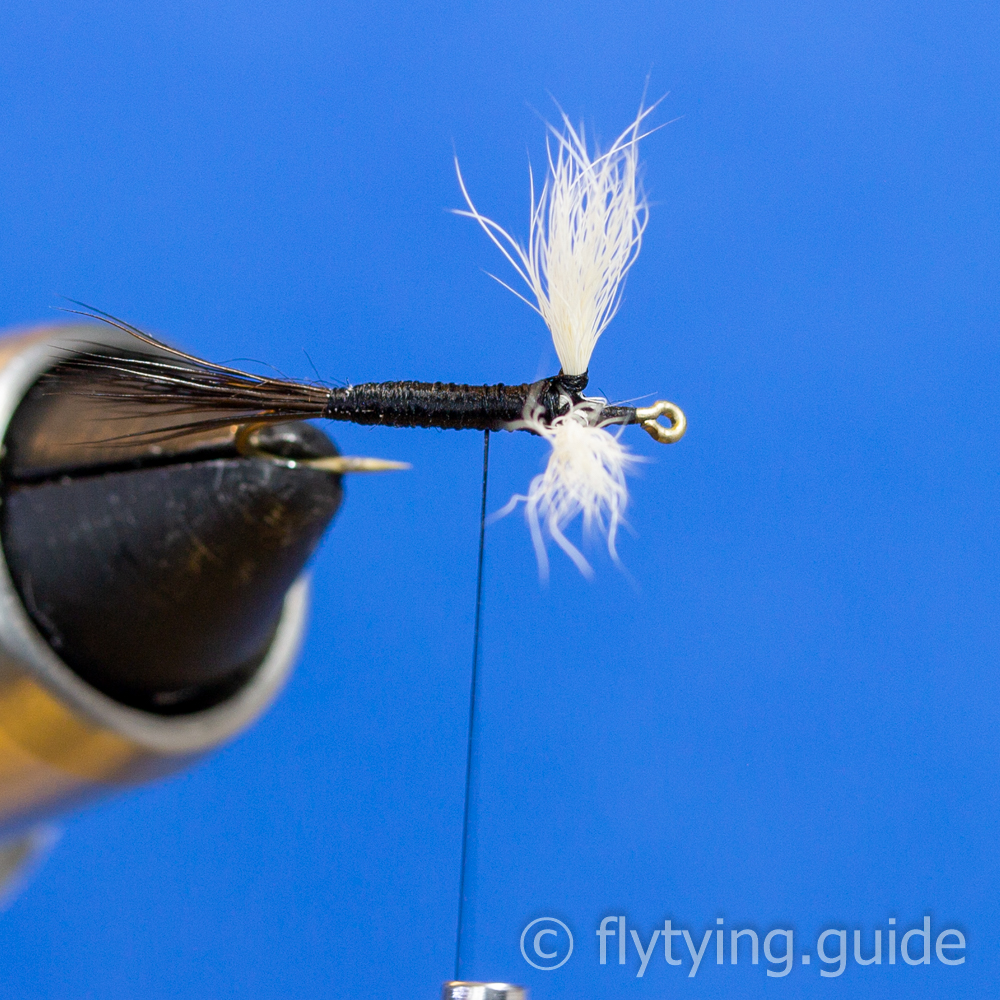
Side view of the wings with the post wraps in place.
10
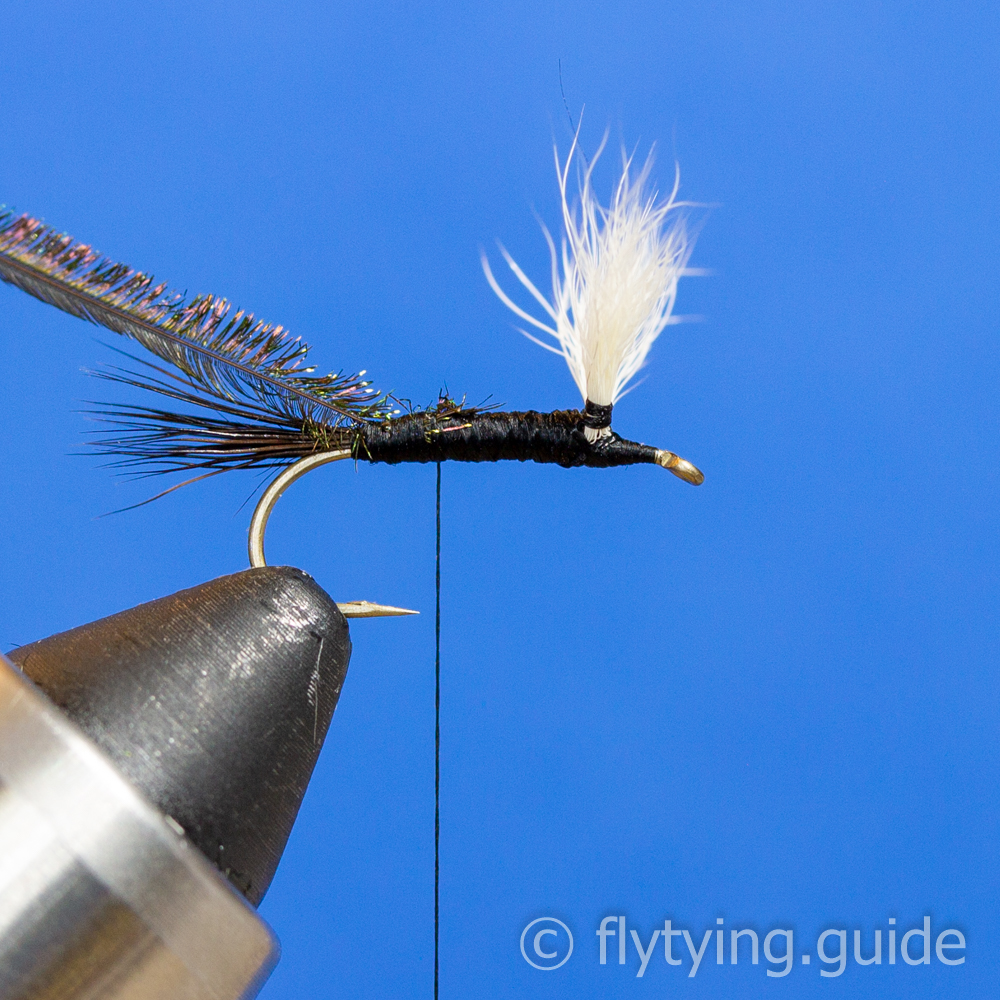
Secure one or two peacock herls by their tips at the start of the bend. Cover the butt ends and remove the excess. End with the thread at the point of the hook.
11
Begin forming the body by taking four or five wraps with the peacock herl until you reach the thread, secure the peacock herl and remove the excess. Advance the thread the desired tag width. The tag length is typically a similar size as the body parts or slightly smaller.
12
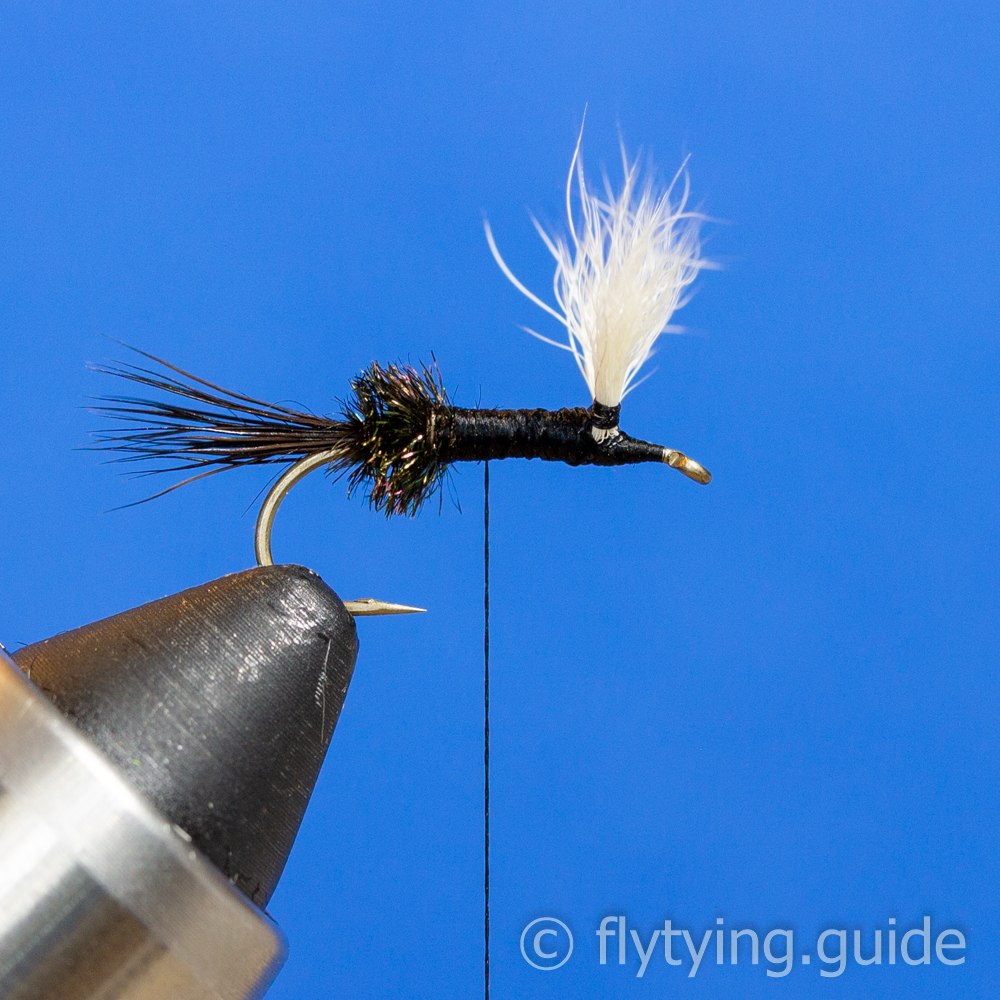
Catch in a length of floss and cover the butt end, it might be easier to gently pull the floss until the butt ends are beneath the thread instead of trimming the excess. Secure with a few tight wraps and then advance the thread until it is at the tags width.
13
Wrap the floss along the underbody to create the tag, secure with thread.
14
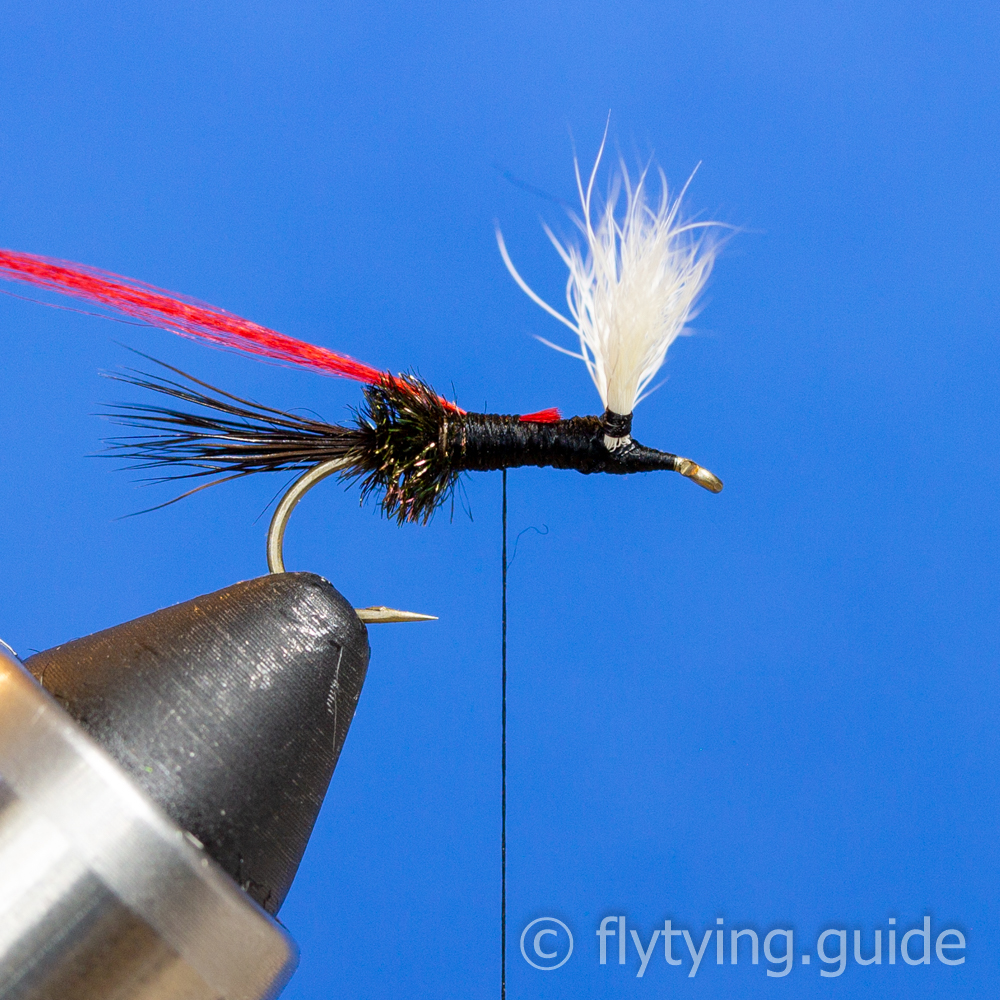
Secure one or two peacock herls by their tips at the end of the tag. Cover the butt ends and remove the excess. End with the thread a little behind the wing, leave space for three or four wraps of hackle.
15
Finish forming the body by taking four or five wraps with the peacock herl until you reach the thread, secure and remove the excess.
16
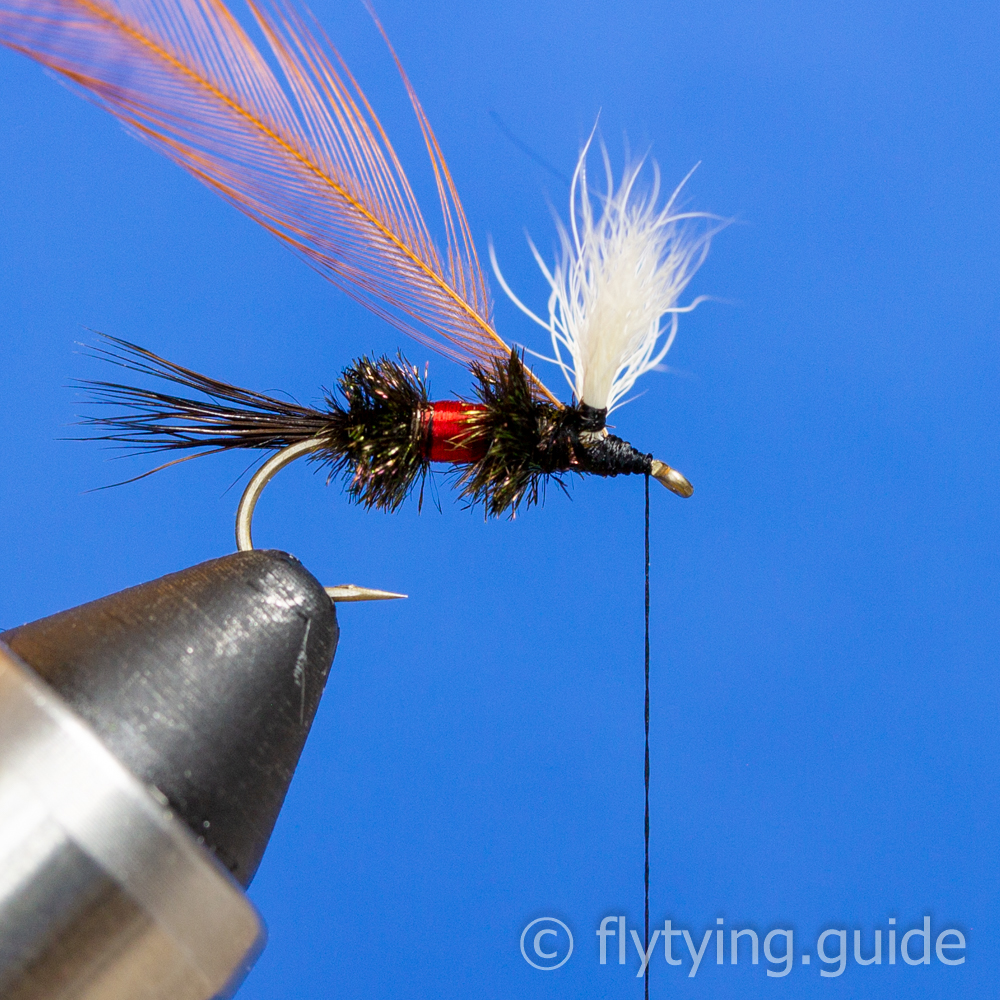
Prepare and tie in the hackle behind the wing. If you plan to use the fly in rough waters you might want to tie in two hackles.
17
Takes wraps of hackle behind the wing until you reach it, then pull the wing back and take wraps directly in front of it. Secure the hackle leaving a little space to form a small head.
18
Whip finish or apply several half hitches, then apply head cement.
19
View of the finished fly from the top.